Generic solar panel installation
-
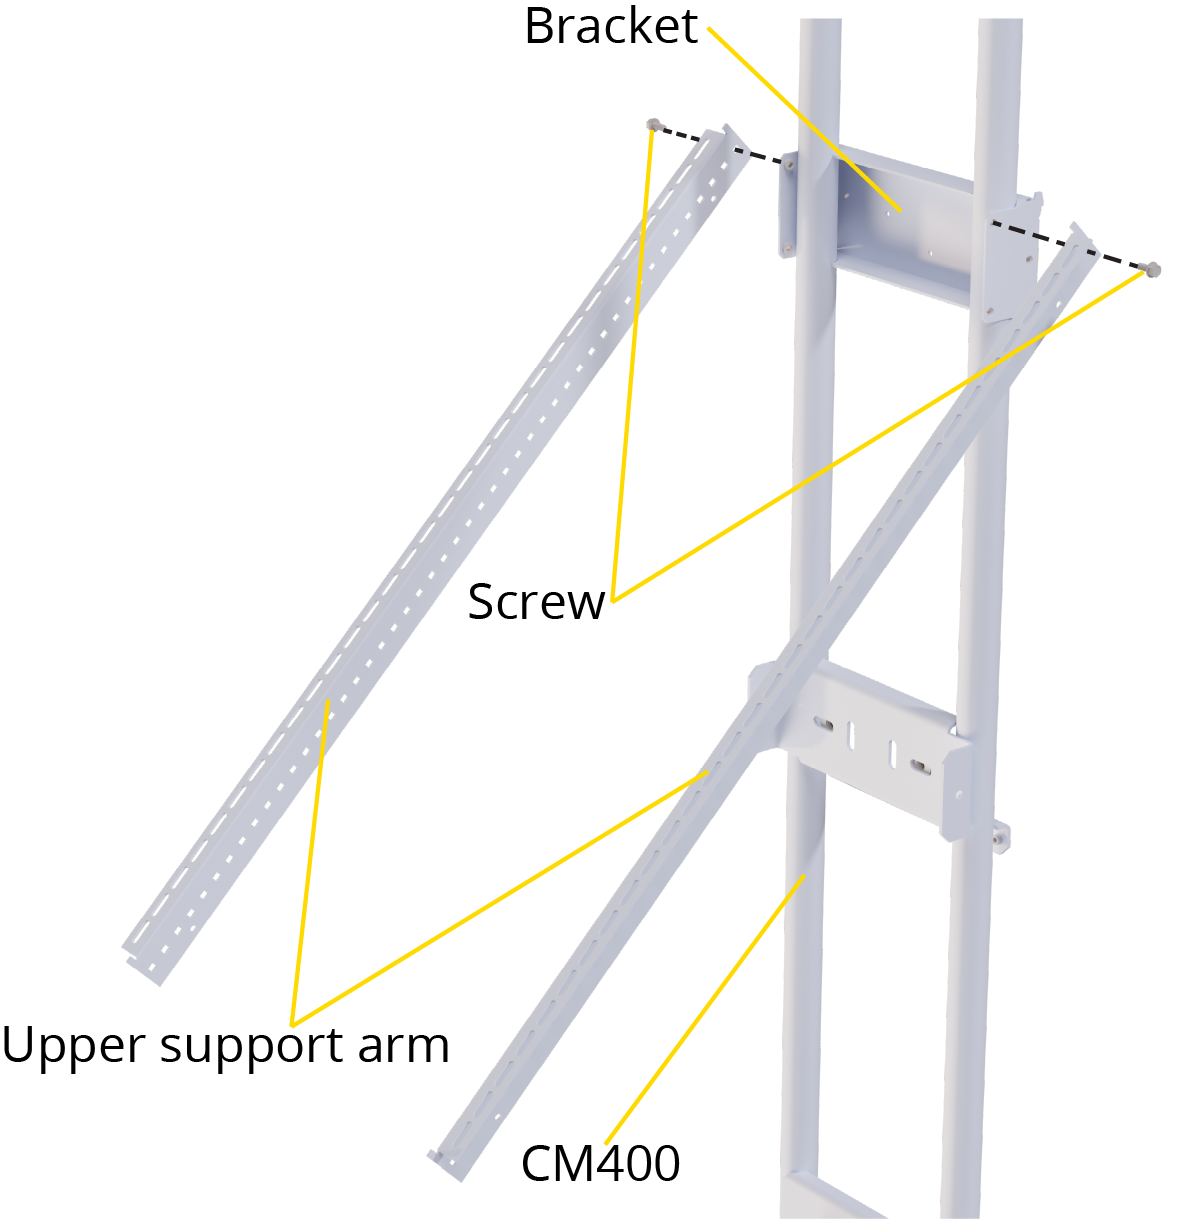
Use 2 screws to attach the upper support arms to the bracket shown on the CM400. Do not fully tighten the bolts.
-
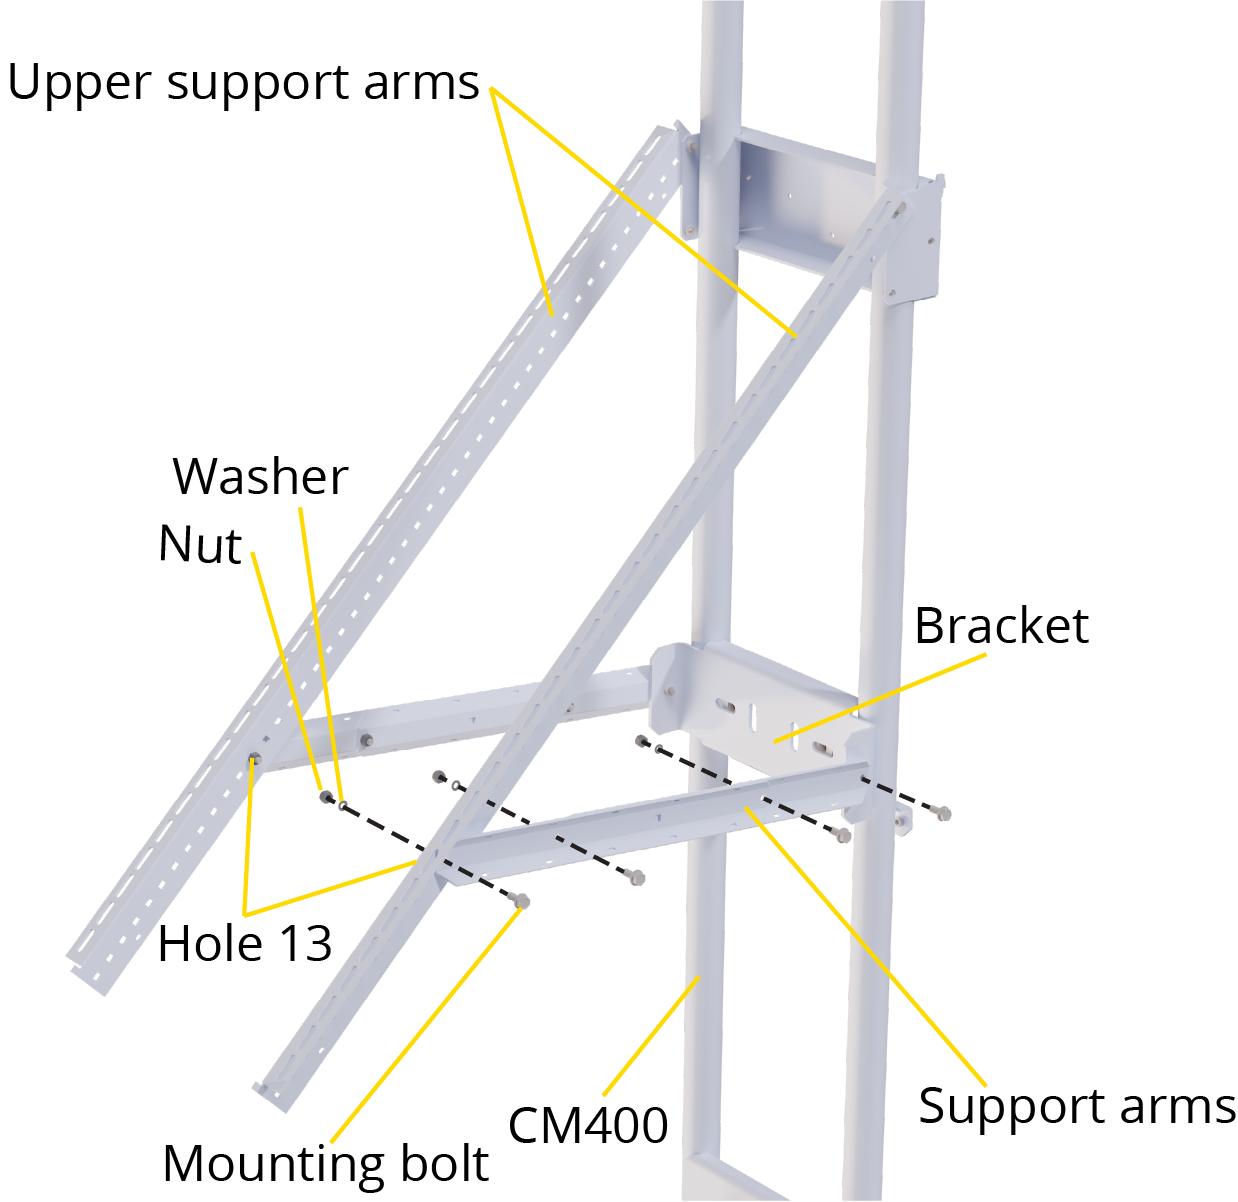
Refer to table Solar panel tilt angle1 to determine the correct tilt angle for the solar panel. Assemble each pair of support arms according to the images accompanying Solar panel tilt angle1, using the angle specified. Secure the arms with bolts, nuts, and washers, and fully tighten the bolts. Attach each assembled support arm to the CM400 using the screw in the bracket as shown.
-
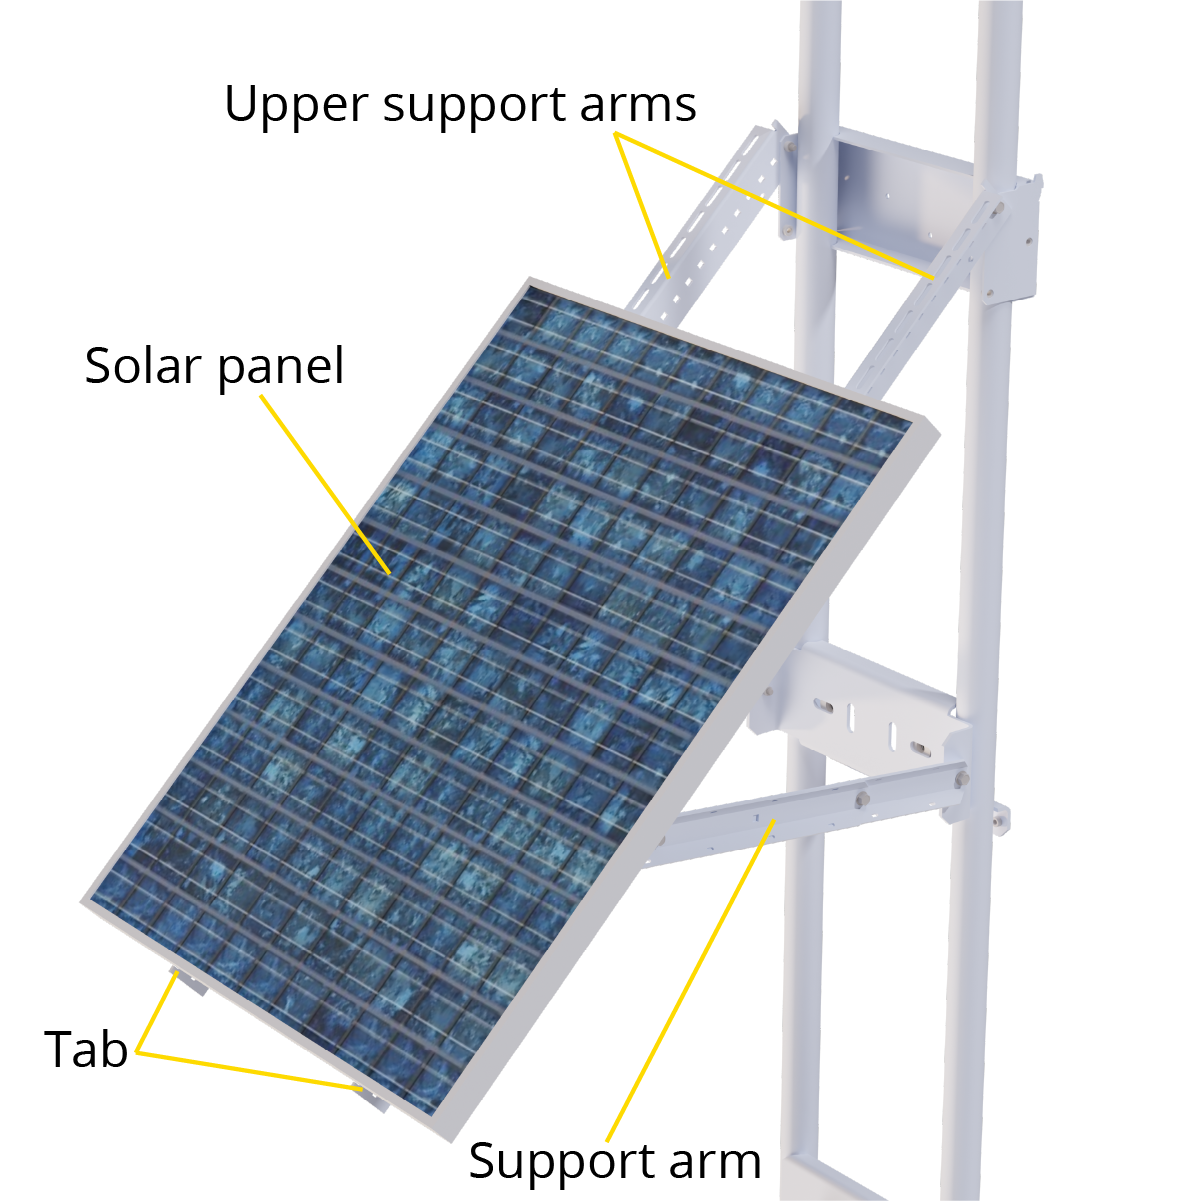
After determining the correct orientation for the solar panel, rest it on the tabs at the bottom of the upper support arms.
-
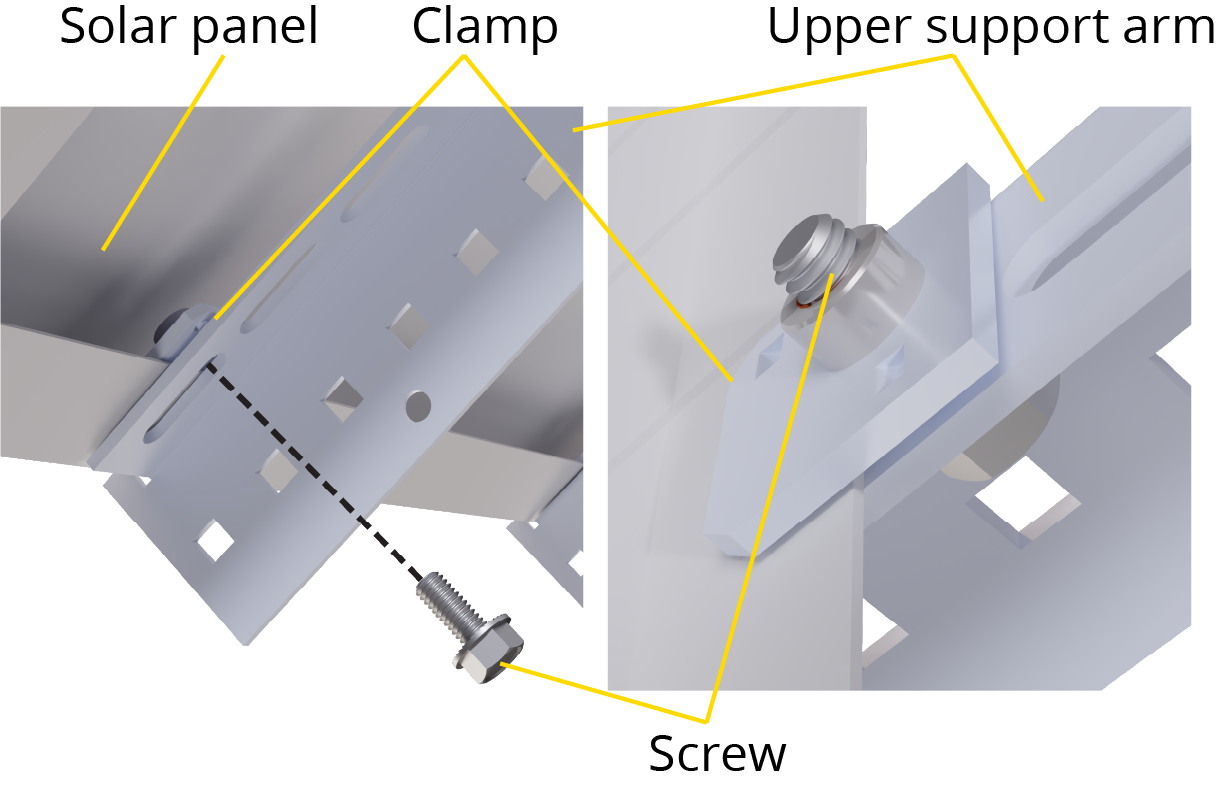
At each point where the solar panel contacts the upper support arms, insert a clamp inside the solar panel frame. Align the clamp threads with an opening in the upper support arm and secure it with a screw. Repeat this process for the remaining three clamps, ensuring all four screws are fully tightened.
-
Fully tighten the 2 screws used in step 1 to attach the upper support arms to the bracket on the CM400.