Alert List
Use Alert List to see the current alerts that have been created and to create new alerts.
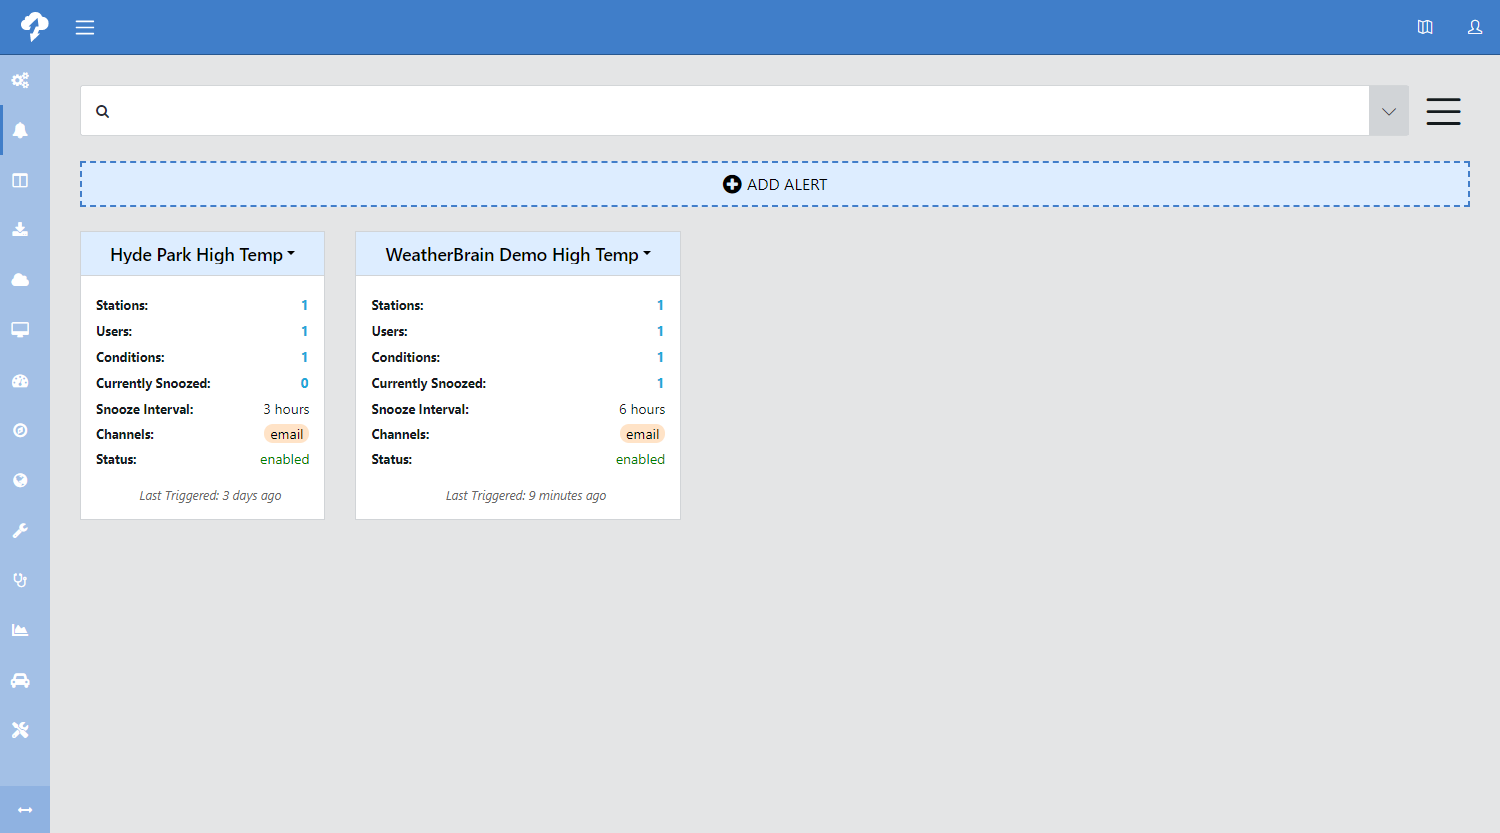
The tiles show the description, number of stations, number of users, number of conditions, number of currently snoozed stations, snooze interval, notification channel, status, and last triggered date. Hover over the number of stations, users, conditions, or currently snoozed stations to display a list of the stations, users, conditions, or currently snoozed stations.
Click ![]() at the upper right to select:
at the upper right to select:
- page size: How many alerts are shown per page.
-
subscription options:
-
subscribe to all: Receive notifications on all alerts.
-
unsubscribe from all: Do not receive notifications on any alerts.
NOTE:These subscription options apply to all the tiles displayed on the page. If you use the search bar to narrow down the tiles first, then with this option you are able to only subscribe to the alerts that are of interest to you. For example, you can search for all alerts for one station, or one measurement, or for all alerts on all stations in a network.
-
Use the drop-down next to the search box at the top of the screen to show descriptions, station names, enabled/disabled status, subscriptions, and networks. Select an option to show only alerts that match that option. Type into the search box to narrow the lists based on what is typed.
Use the drop-arrow next to an alert to:
-
Edit the alert settings.
-
Disable/enable the alert.
-
Toggle the snooze on/off. A pop-up window will be displayed allowing you to toggle the snooze for all stations or just individual stations.
-
Clone the alert. This is useful to create a new alerts with similar settings. After cloning, the new alert can be edited as desired.
-
Subscribe/Unsubscribe: Receive notifications/no longer receive notifications for this alert.
NOTE:If there are no subscribers to an alert, it will automatically be disabled when the last user unsubscribes. If a user subscribes to a disabled alert, they will also need to enable it. That does not happen automatically.
-
Click Add Alert
-
Select Stations to include in the alert. Click Select All to include all stations in the alert. Click Next.
-
Select the measurement to use for the alert. Use Display sensor name to toggle the measurement selection list between the aliases and the sensor names (raw variables). (See Measurements for information on setting/changing aliases.) Click Next.
-
Select the Condition Type:
-
Greater Than
-
Less Than
-
Equal To
-
Not Equal To
-
Within Range
-
-
Under Condition Value, enter number(s) to specify the value to which the data value should be compared. Click Next.
NOTE:When entering the Condition Value for an alert, use values that are in the unit of measure for the data being recorded by the data logger. You can perform a unit conversion for the alert message sent to users (see Step 8), but that conversion only applies to the number being displayed in the message. For example, if you want to be alerted when the wind speed exceeds 50 mph, but the station is recording data in m/s, set your alert threshold to be greater than 22.35, instead of 50.
-
Click Add to add a new notification channel.
-
Select Email.
-
Enter the Subject and Body for the message. Click Save.
TIP:Right-click to access the Insert Placeholder pop-up menu to include the station name, measurement time, measurement value, measurement name, measurement alias, or measurement unit of measure in the subject or body. To copy, cut, and paste, use the keyboard shortcuts Ctrl+C, Ctrl+X, and Ctrl+V. Click Next to continue to the next tab.
For unit conversion, the Body can contain the following arithmetic operations:
-
add
-
subtract
-
multiply
-
divide
Multiple arithmetic operations can be handled by adding the pipe delimiter “|” and then adding the next operation. Operations will be performed in the order they are entered into the string. (Complex formulas are not supported and BEDMAS rules do not apply.)
The end result will be displayed with the same amount of decimal places as the original measurement.
Examples
-
Celsius to Fahrenheit conversion:
{{{airt_c_avg@FiveMin.value|multiply:1.8|add:32}}}
-
Meters per second to Miles per hour conversion:
{{{ws_ms_max@onemin.value|multiply:2.23694}}}
-
Knots to Mile per hour conversion:
{{{ws_ms_max@onemin.value|multiply:1.15078}}}
-
Millimeters to Inches conversion:
{{{rain_mm_tot@hourly.value|divide:25.4}}}
You must manually enter the unit of measure after your converted value, as the unit of measure placeholder will return the unit of measure of the recorded data being ingested into Campbell Cloud from the data logger.
If the operation does not contain a numeric value or the operation cannot be completed, a blank string will be returned in place of the function
-
-
(optional) Click
 to see a preview of the alert with the placeholders filled in. Click
  to edit the notification channel. Click
  to delete the notification channel. Click Next.
 -
Enter a Snooze Interval. This is the amount of time after the alert is triggered before another message will be sent. Click Next.
-
Select User(s) who will receive the notifications for the alert. Click Next.
-
Provide a Description of the alert.
-
Click Submit