Maintenance and calibration
Sensor maintenance should be performed at regular intervals, depending on the desired accuracy and the conditions of use.
-
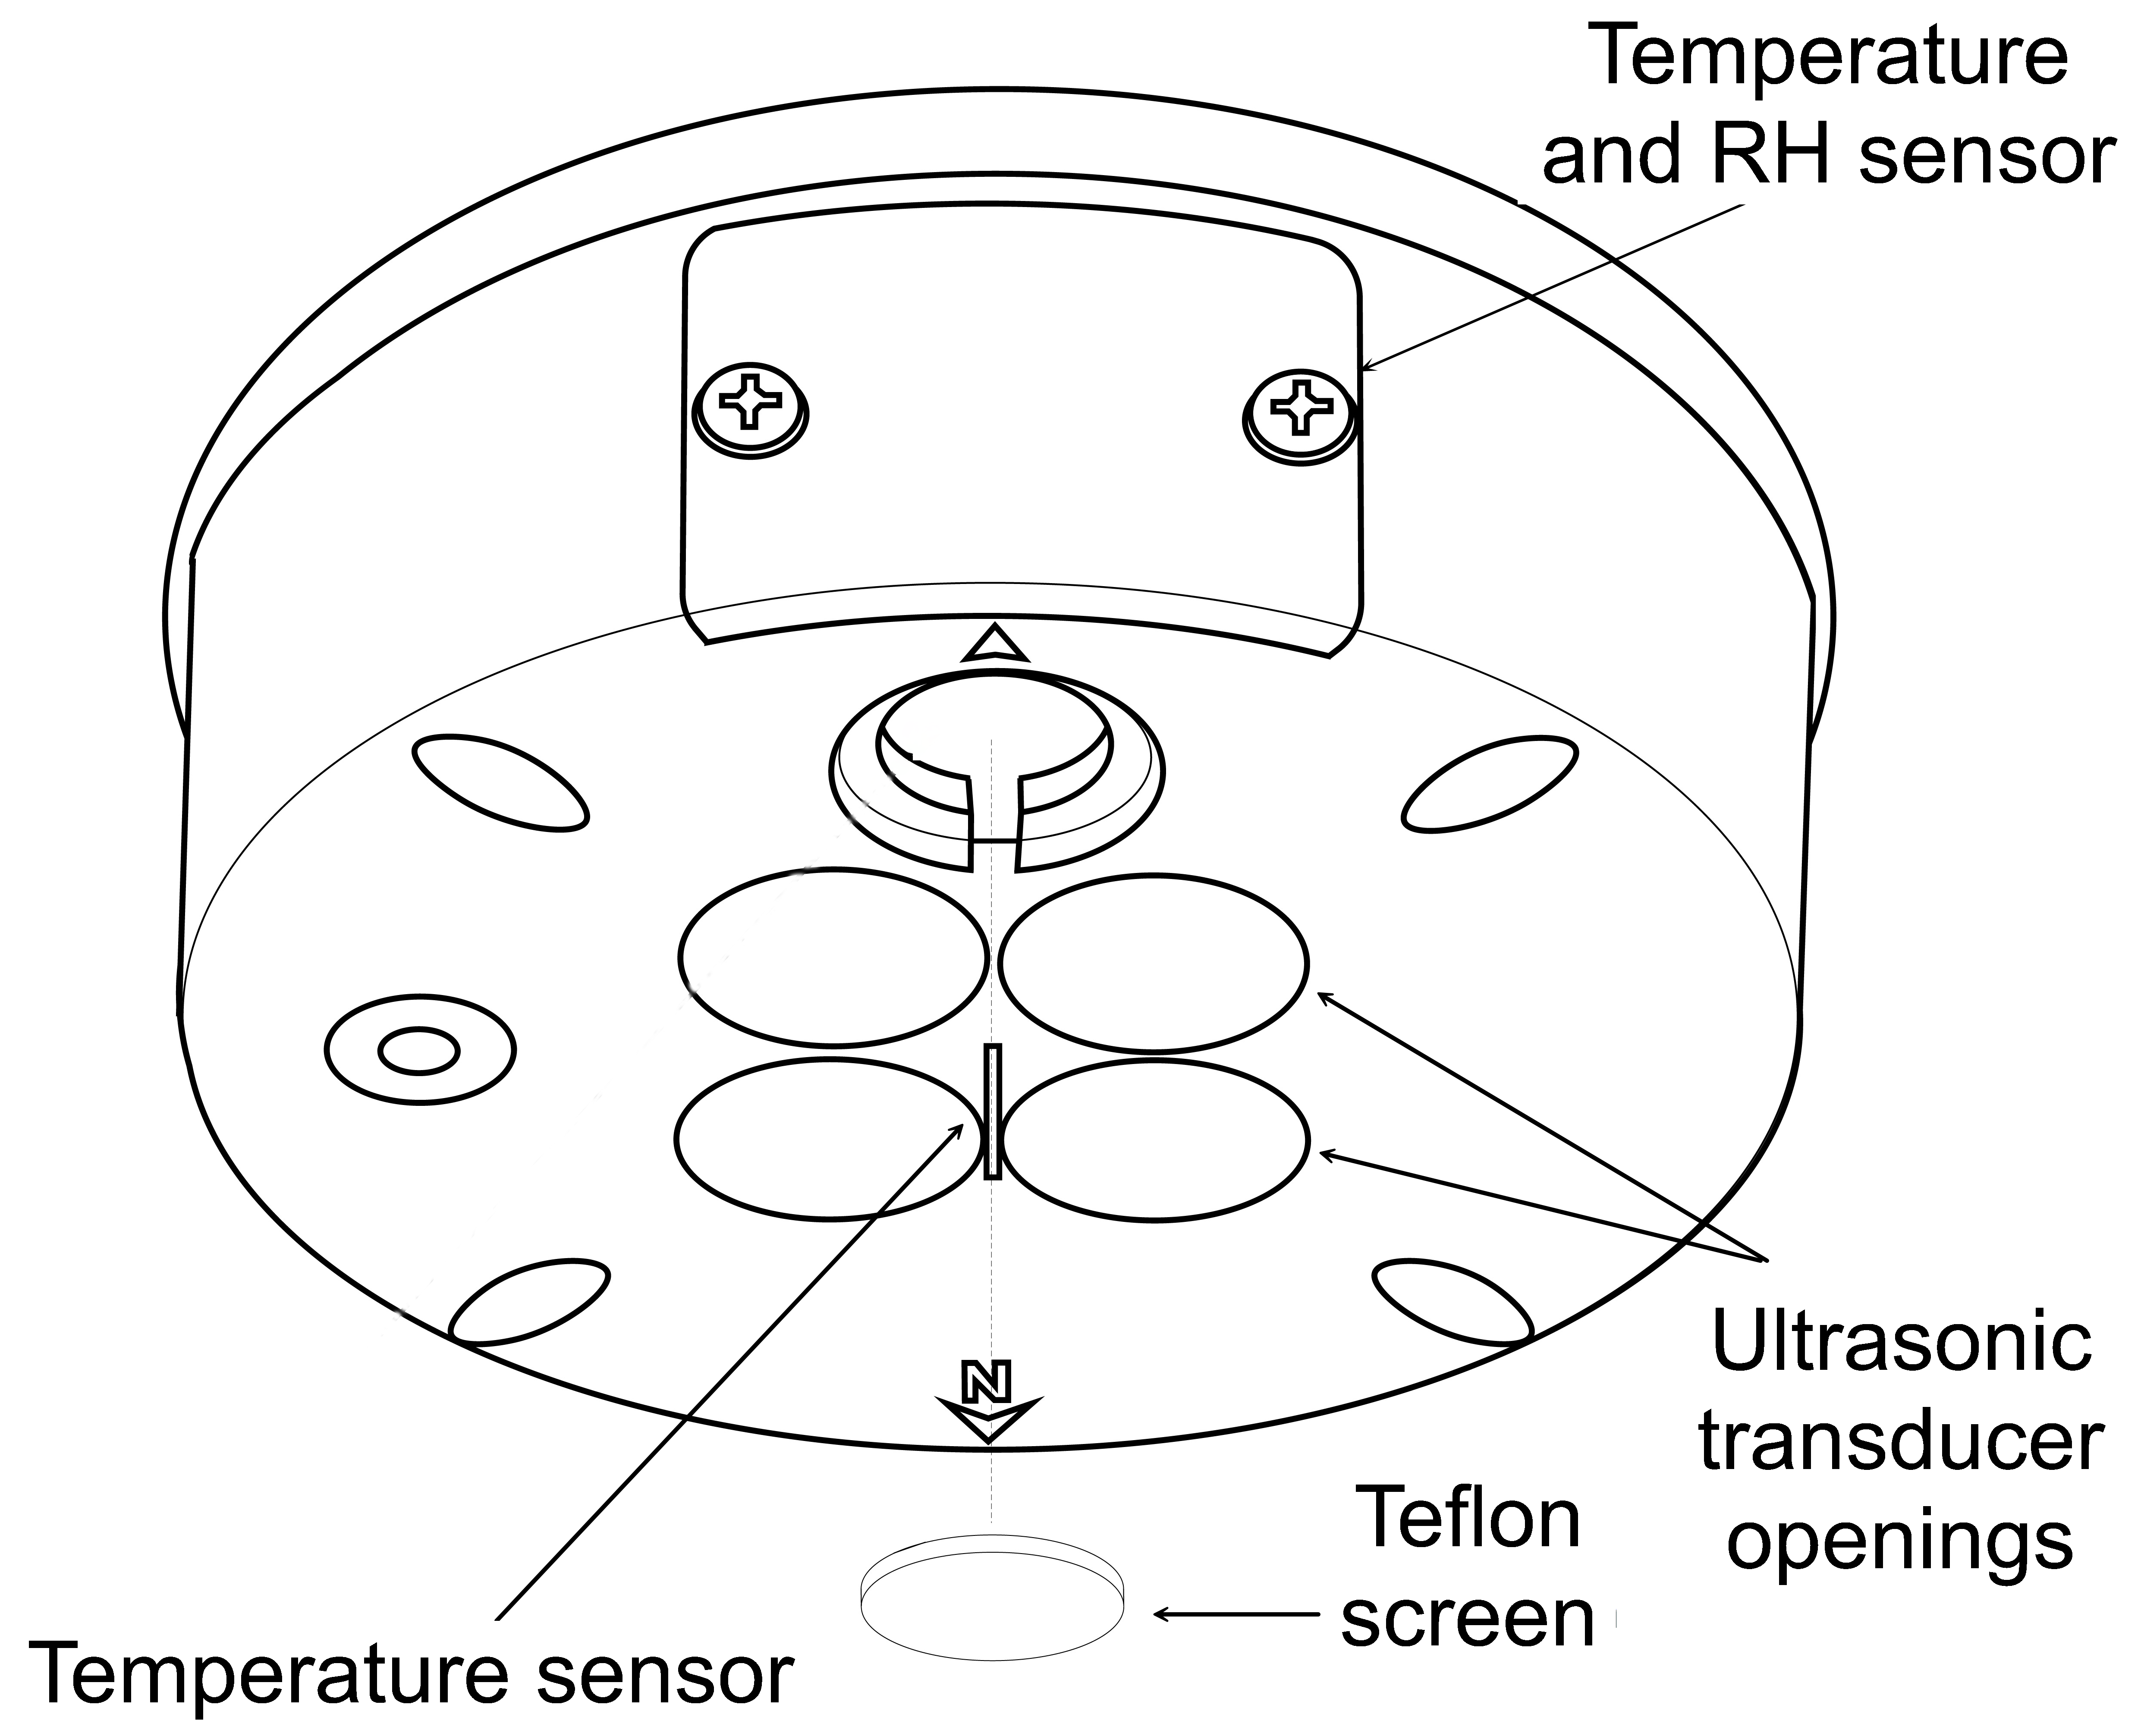
Remove cobwebs, leaves, bird droppings, wasp nests, or other debris from the temperature sensor (Temperature sensor and ultrasonic transducer openings), ultrasonic transducer openings (Temperature sensor and ultrasonic transducer openings), rain gauge funnel (Top view of ClimaVue 50 G2)
CAUTION:Do not touch the temperature sensor when cleaning, because it is very delicate and can be damaged if pushed into the body.
-
Scrub the body with light to medium pressure using a warm, damp cloth.
CAUTION:Gently clean the sonic transducers and do not allow water to enter the ultrasonic sensors (Temperature sensor and ultrasonic transducer openings). Water may corrode the metal parts inside the sensors and ruin them.
-
Clean around posts and between crevices using a dry brush.
-
Inspect the Teflon screen
-
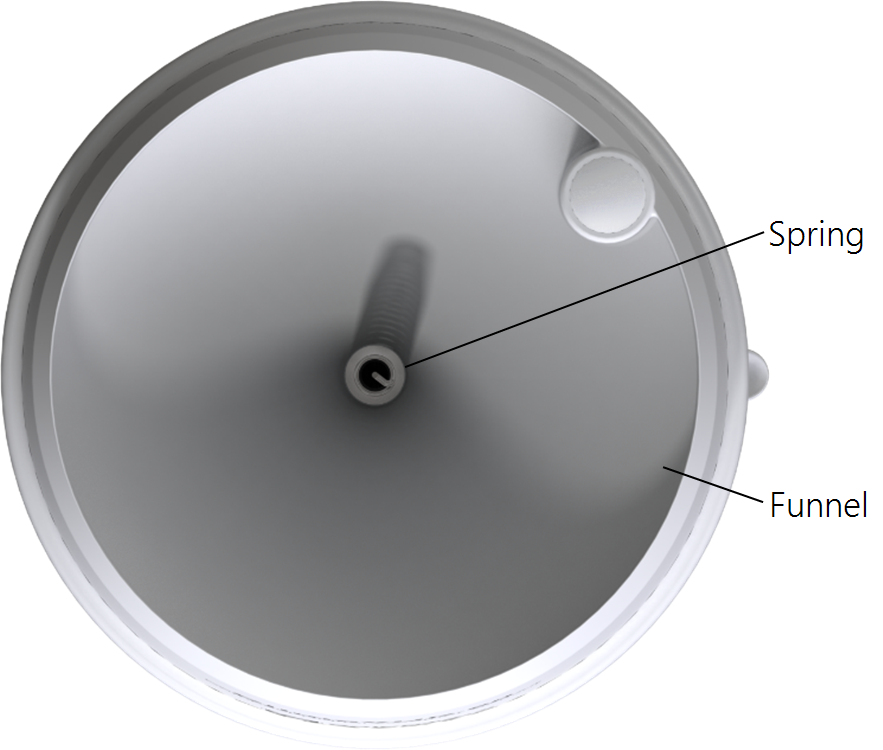
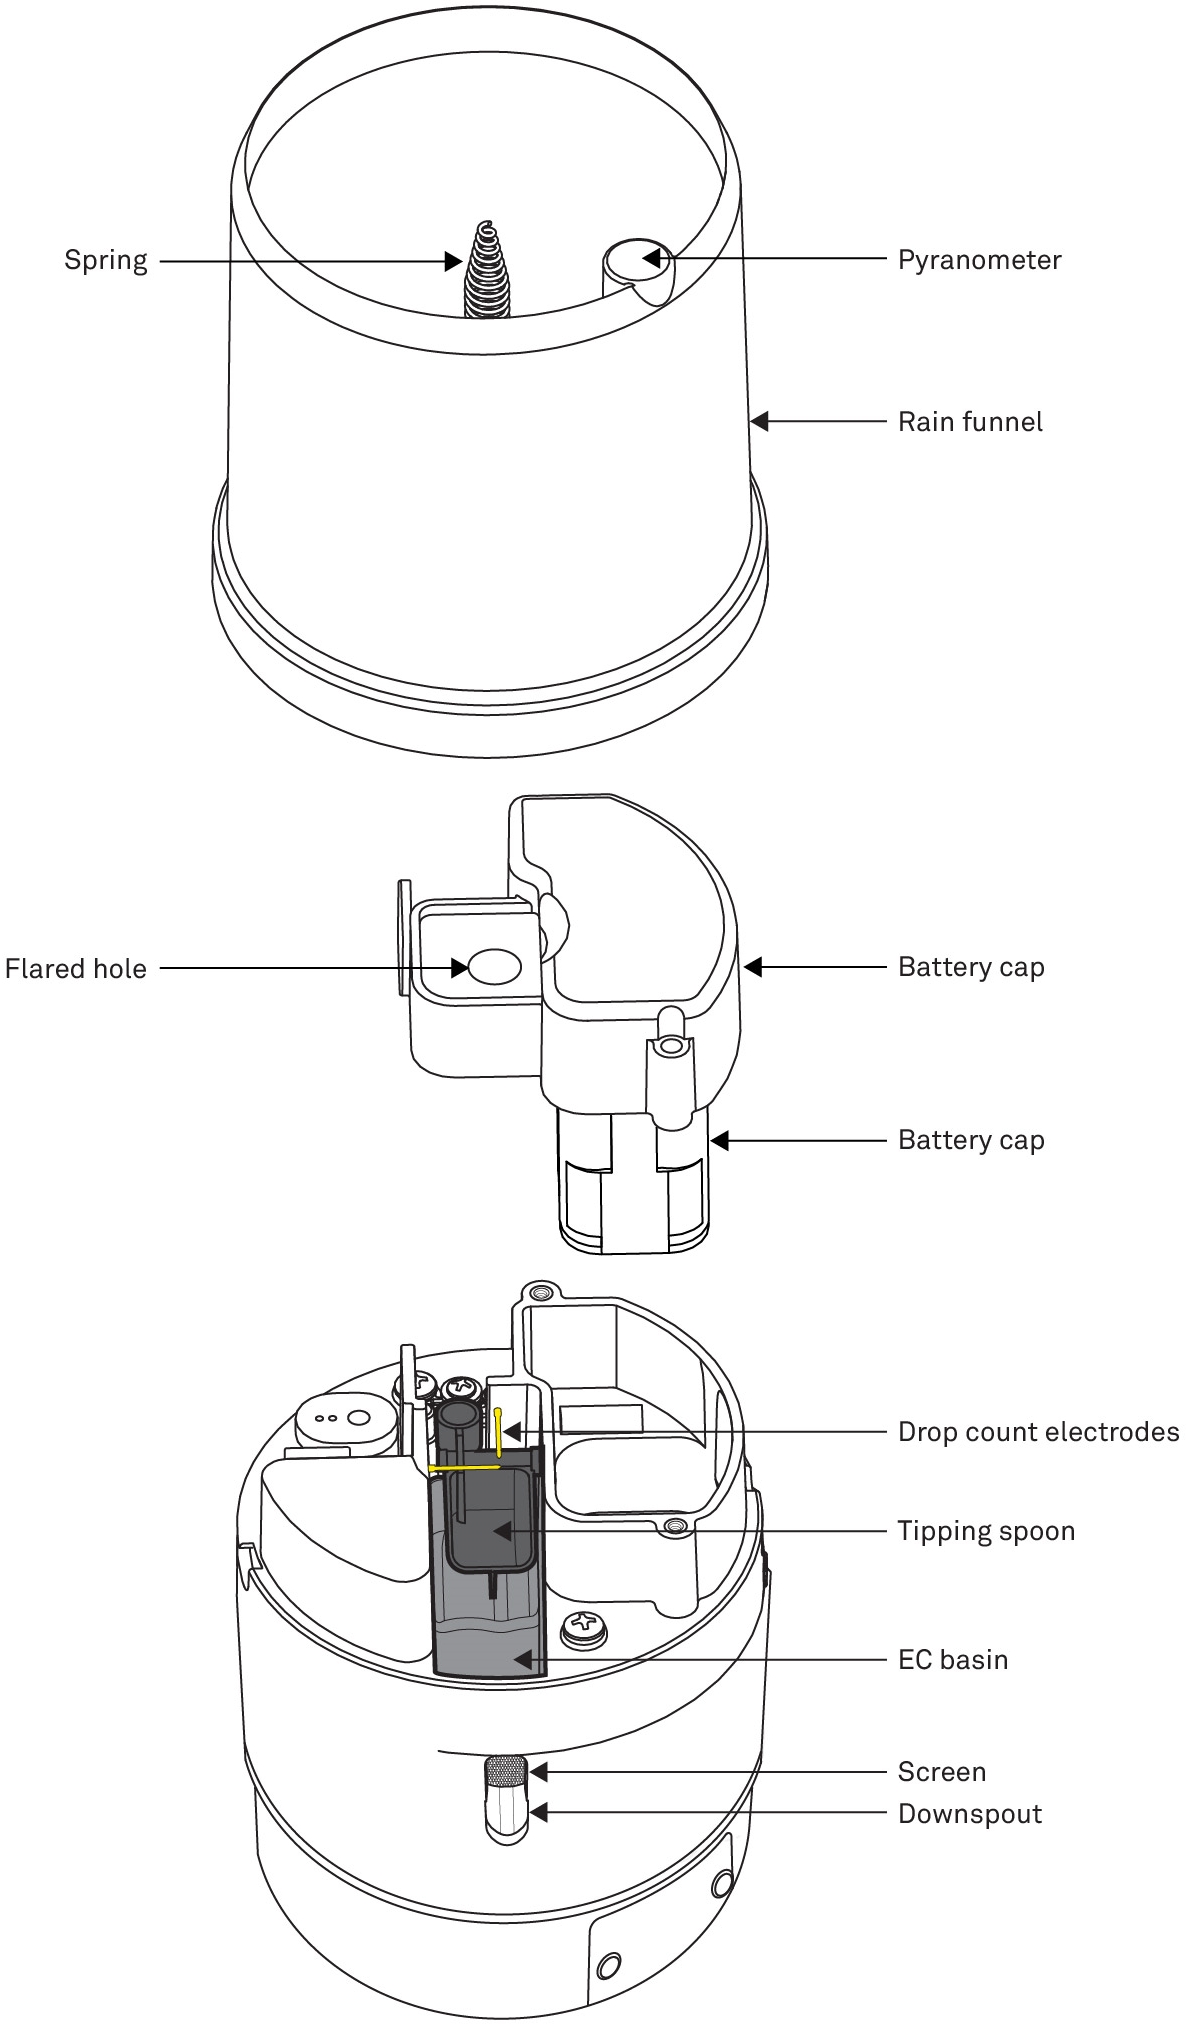
Rain gauge maintenance. Routine maintenance is essential for accurate rainfall measurements. Debris blocking the inlet (funnel, spring, downspout, and flared hole) can result in under reporting of rainfall. Debris blocking the downspout screen can result in over reporting of rainfall. The funnel locks in place using two pegs on the side of the funnel. To access the inside of the rain gauge:
-
Press the funnel down against the spring and turn counter clockwise.
-
If necessary, remove funnel.
-
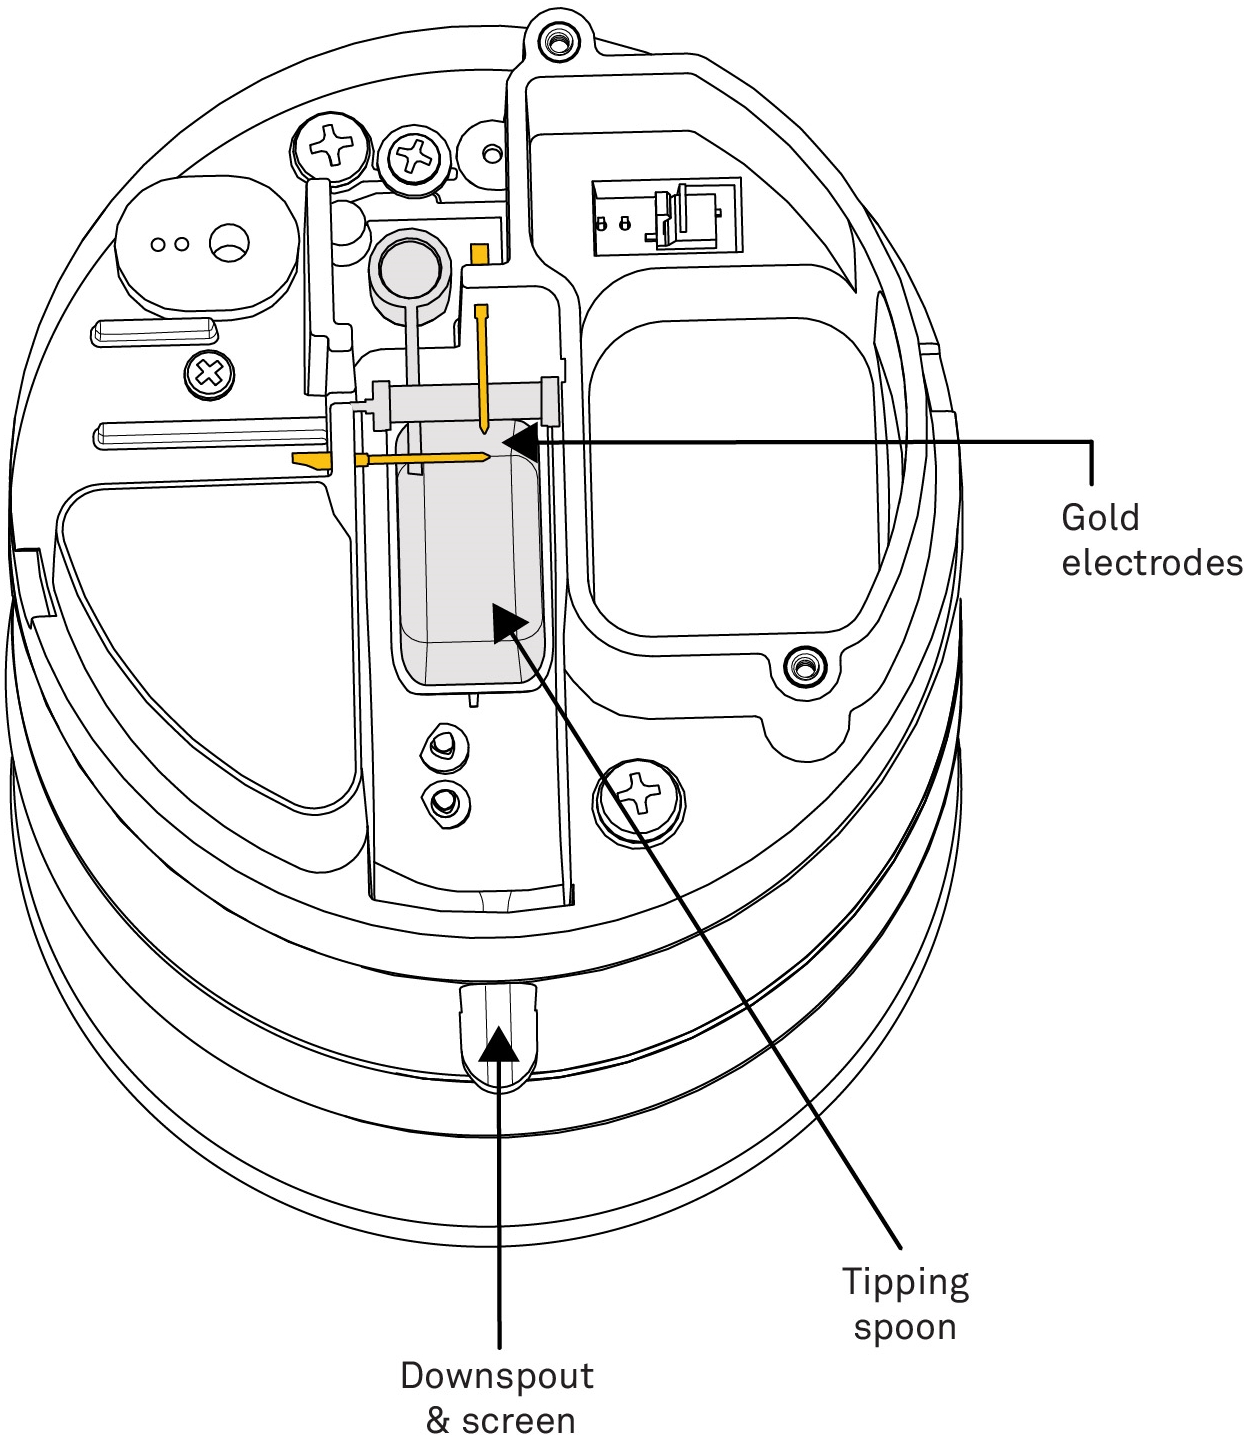
Check the downspout for debris (Downspout and screen, tipping spoon, and gold electrodes). Use a pipe cleaner or small soft brush to clean the downspout.
-
If needed, clean the spring after twisting it loose. Ensure the gold electrodes are free of debris and contamination.
-
Reattach the pyranometer connector.
-
Check the downspout screen is clean and in place on the water exit downspout. If this screen gets plugged with debris, water can back up to the drip counting gold electrodes causing extra counts that can more than double the recorded rain. The screen keeps bugs out of the interior of the sensor.
-
Replace the funnel by lining up the lock/unlock label located on the side of the funnel with the notch on the interface plate.
-
Press the funnel down against the spring and turn clockwise until it clicks in place.
-
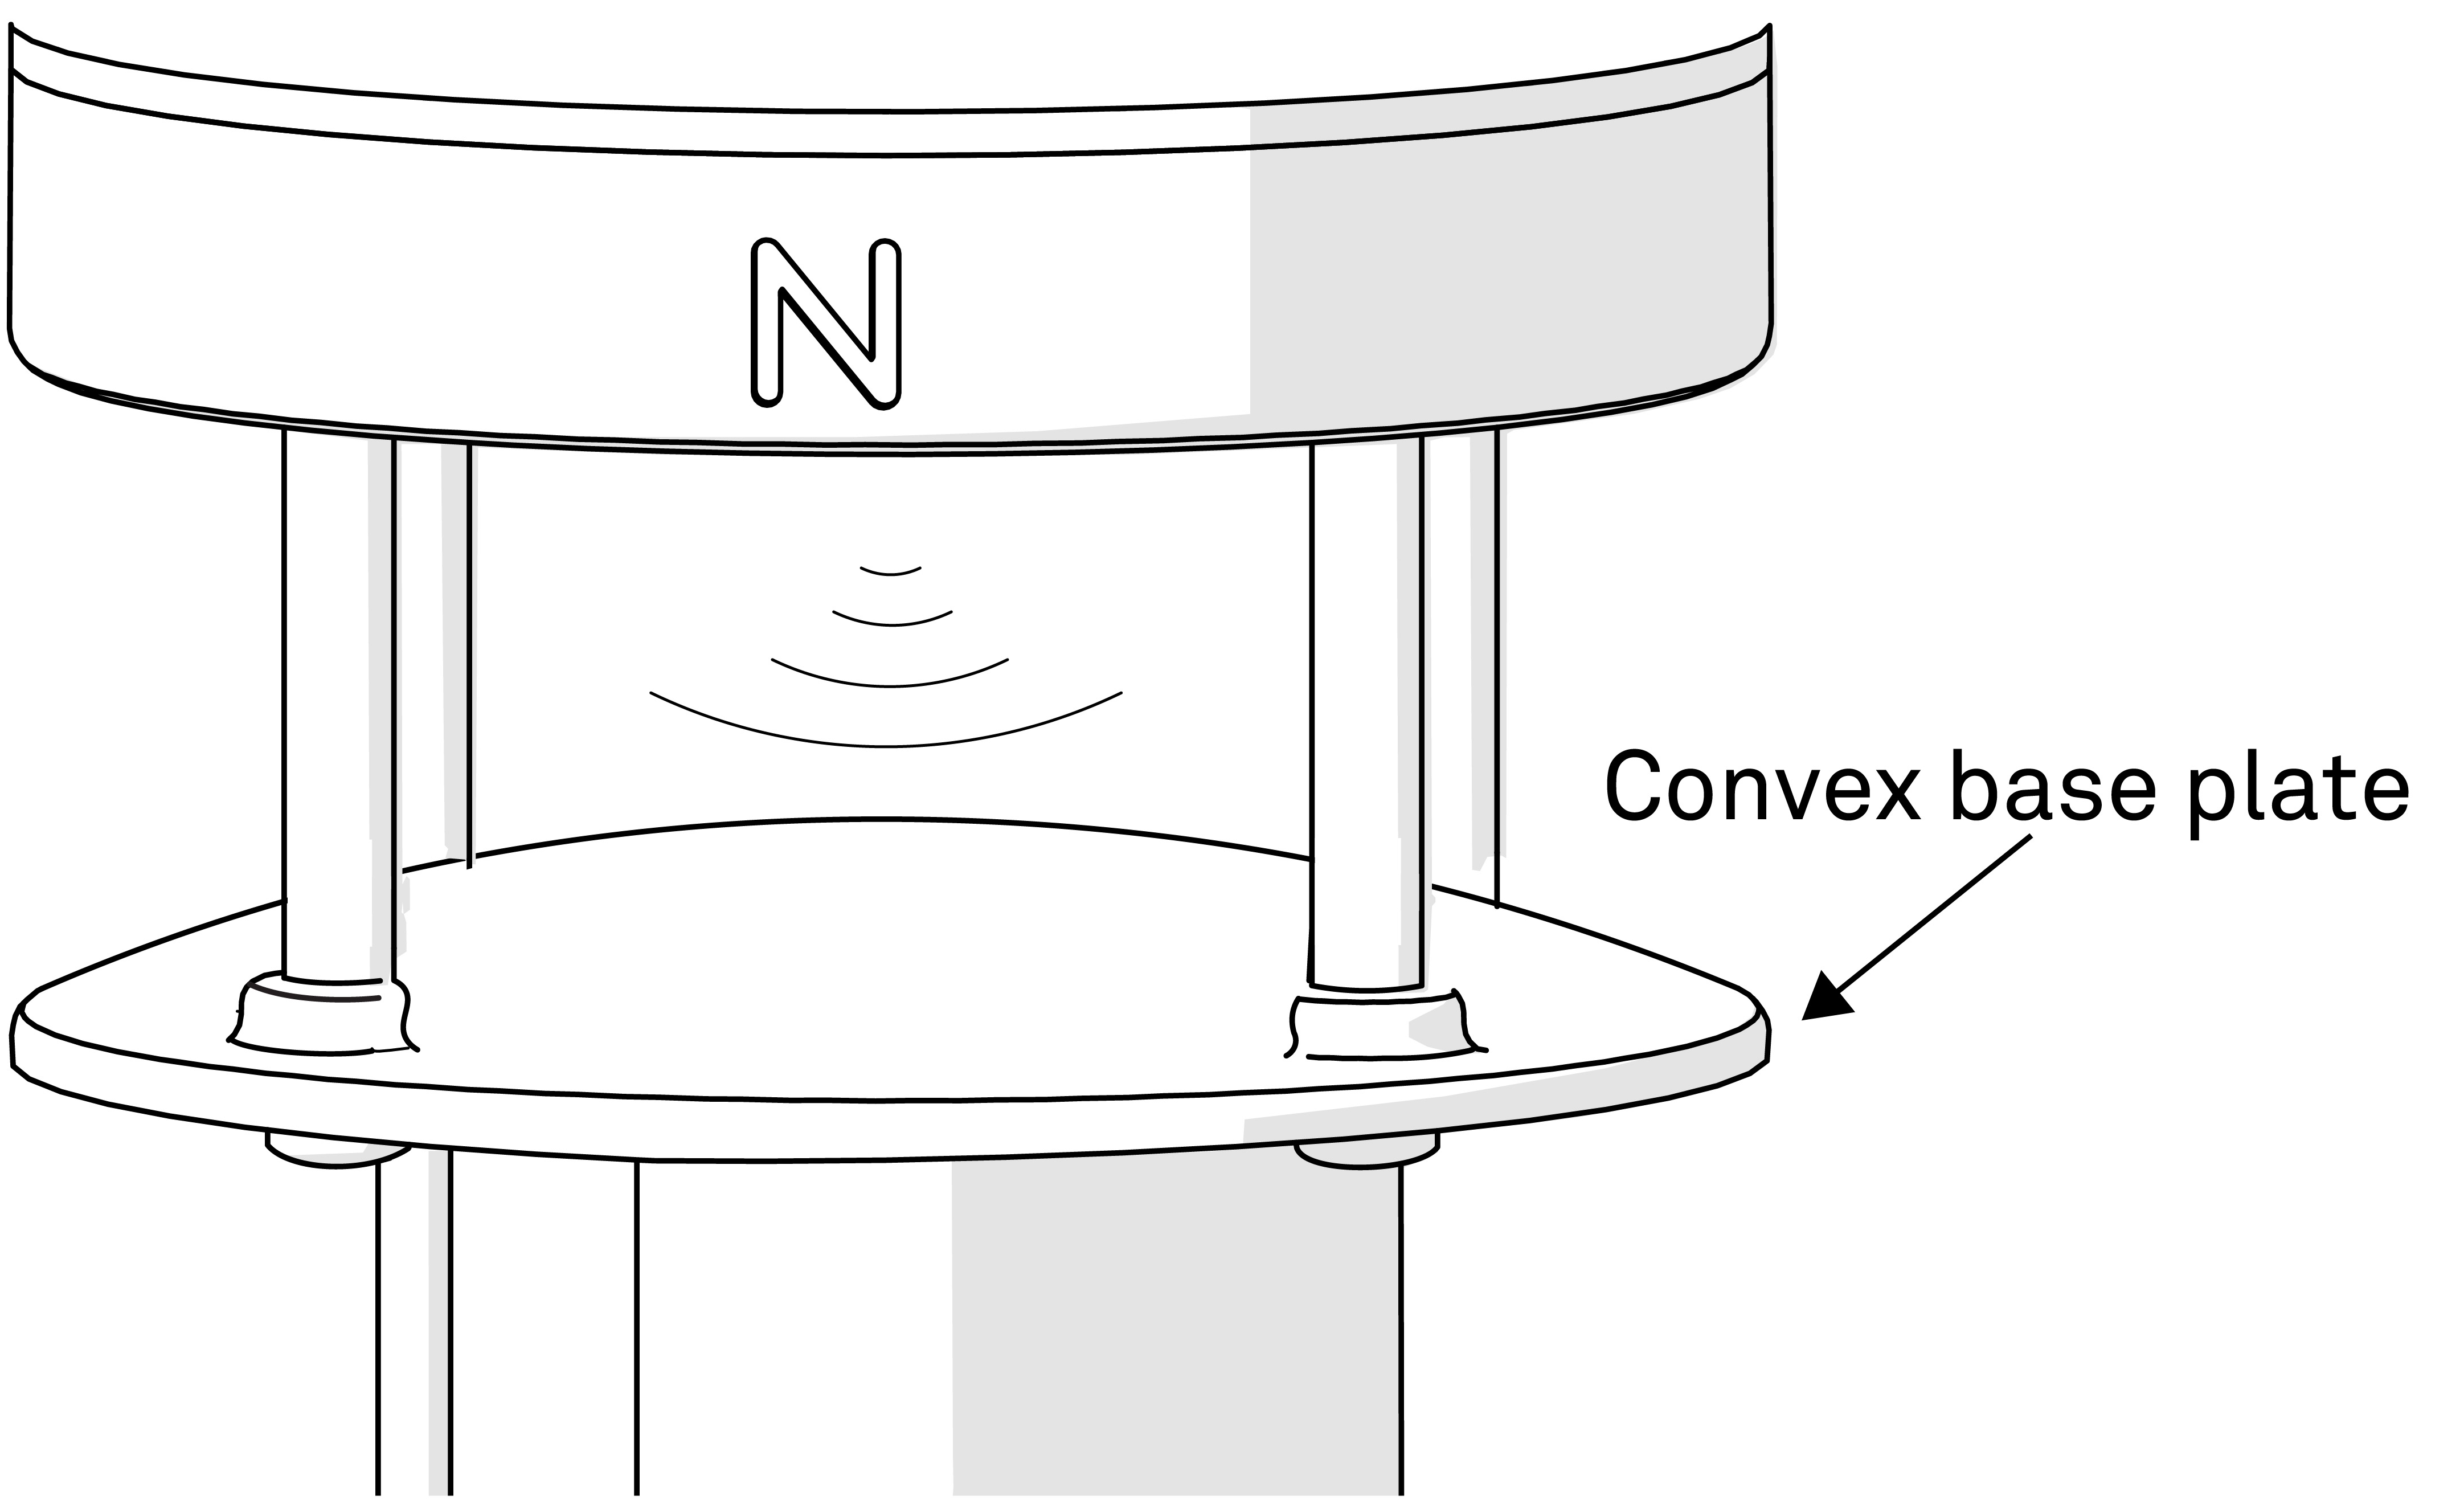
Check the level of the ClimaVue 50 G2 (either with a torpedo level, bubble level, or the built-in tilt sensor).
-
-
Pyranometer maintenance. Gently clean the pyranometer first with a spray of distilled/clean water and next with a soft damp cloth. Install the bird spike kit if bird droppings are present (Optional bird spike kit).
Calibrate or replace the pyranometer every two years. The pyranometer calibration number needs to be changed when the funnel containing the pyranometer is replaced. Campbell Scientific will send a calibration certificate listing the new number with the recalibrated or replaced pyranometer. An extended SDI-12 command is used to replace the calibration number (Extended commands). Contact Campbell Scientific for more information.
To determine if the pyranometer needs to be cleaned or recalibrated, compare the data from one or more clear sky days with data calculated using a clear sky calculator. Several clear sky calculators are available online.
If the pyranometer data is less than the comparison clear sky data on a clear day, the pyranometer sensor is dirty or needs to be calibrated. Collect and review a couple days of data to be sure it wasn’t a bird covering the sensor.
-
Relative humidity and barometric pressure maintenance. A field-replaceable module contains the barometric pressure and relative humidity sensors. This module is