QuickStart
Use our Device Configuration Utility to enter the required
-
Connect the data logger RS-232 to the TX325 RS-232 connector and connect the data logger to a power supply.
-
Connect the TX325 power connector to the transmitter power supply.
CAUTION:The TX325 should never directly draw power from the data logger. The transmitter draws 2.5 A of power during transmission. The data logger can provide a maximum of 0.9 A over its 12 VDC terminals, which is insufficient. To avoid transmission issues, ensure that the TX325 power is directly connected to the charging regulator or the battery.
-
Connect to the data logger using Device Configuration Utility.
-
Do the following to directly connect your data logger to the Device Configuration Utility:
-
Use the USB cable to connect the data logger to the computer.
-
Click your data logger model for the Device Type in the Device Configuration Utility.
-
Click Direct for the Connection Type.
-
Select the Communication port on the computer to which the data logger is connected.
-
Click Connect.
-
For data loggers on an IP connection, do the following to remotely connect with the Device Configuration Utility:
-
Click your data logger model for the Device Type in the Device Configuration Utility.
-
Click IP for the Connection Type.
-
Type the Server Address.
-
Type the PakBus/TCP Password.
-
Click Connect.
-
-
Click the Settings Editor tab.
-
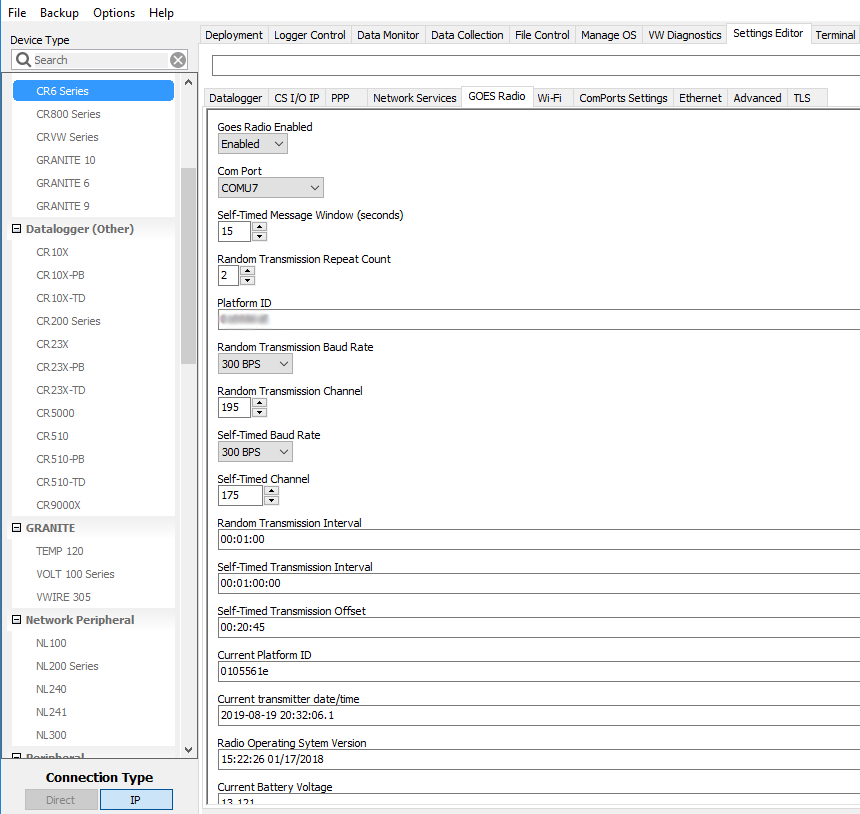
Click the GOES Radio sub tab (Device Configuration Utility GOES Radio screen).
-
Select Enabled from the Goes Radio Enabled field.
-
Select the Com Port to which the GOES radio is connected.
-
Type the Self-timed Message Windows (in seconds) as assigned by
-
Type the Platform ID (in HEX) as assigned by
-
Select the Random Transmission Baud Rate as assigned by
-
Type the Random Transmission Channel as assigned by
-
Select the Self-Time Baud Rate as assigned by
-
Type the Self-Time Channel as assigned by
-
Type the Random Transmission Interval as assigned by
-
Type the Self-timed Transmission Interval as assigned by
-
Type the Self-timed Transmission Offset as assigned by
-
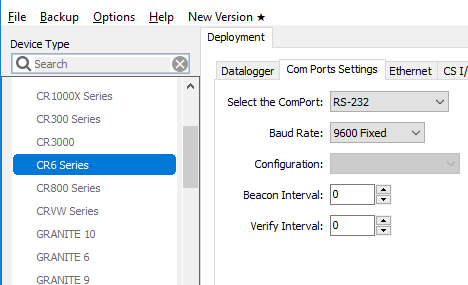
Click the Deployment tab.
-
Click the Com Port Settings sub tab.
-
Select 9600 for the Baud Rate.
-
Click Apply to save the changes.
Now the settings are stored in the data logger. CRBasic programming is required to push data over the network. The GOESTable() and GOESField() CRBasic instructions used in conjunction with DataTable() facilitate the transmission of data across the GOES satellite network.