Field installation
Campbell Scientific offers a SoilVue 10 installation kit (Components of the installation kit).

A – Auger extension shaft
B – Hex socket
C – Hex socket handle
D – Edelman auger
E – Auger clean-out tool
F – Rods to aid in disassembly (insert through holes in extension shaft)
G – T-handle for auger/extension shaft
The installation kit is not necessary to install the SoilVue 10. A standard 5‑cm (2‑in) hand auger may be used instead of the auger supplied in the kit. The SoilVue 10 can then be inserted into the hole using a standard six‑sided 2.25‑inch socket.
Do not use a power auger since they may enlarge the hole diameter beyond the desired specification for a properly installed probe. Power augers also tend to bring soil up from lower depths, coating the sides of the hole, which may have adverse effects on the measurements.
-
Connect the T-handle (Components of the installation kit, G) to the auger extension shaft (Components of the installation kit, A) then connect the shaft to the auger (Components of the installation kit, D).
-
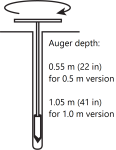
Use the auger assembly to create a hole with a 5‑cm (2‑in) diameter that is approximately 5 cm (2 in) deeper than the SoilVue 10 length. The auger is narrow at the tip, so making the hole slightly deeper will ensure that the sensor can be fully installed.
CAUTION:Large gaps between the SoilVue 10 and the hole bottom can adversely affect the measurements. The following auger depths allow proper installation and avoid large gaps.
-
Care should be taken to ensure the sides of the hole are even and parallel and do not become tapered with repeated removal of soil.
-
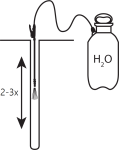
Wet the sides of the hole to reduce the force needed to install the probe. In most cases, the hole will need to be thoroughly wetted.
-
Insert the hex socket handle into the small holes in the hex socket (Hex socket handle and hex socket).
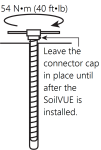
CAUTION:Leave the plastic cap on the cable connection until the sensor is completely installed and ready to connect the cable.
-
Place the hex socket on top of the probe and use the handle to screw the probe into the augered hole.
CAUTION:Applying too much force to the sensor during installation can break or crack it. The maximum torque applied during installation should not exceed 54 N•m (40 ft•lb). If significant effort is required to install, remove the sensor, make the hole slightly deeper, add more water, create another hole, or try a combination of these options before trying again.
-
When the probe is partially installed, remove 5 cm (2 in) of soil around the top of the hole. This will prevent the connector from digging into the soil as the probe is installed and provide room for connecting the cable.
-
When the top of the probe is flush with the soil surface, the top sensor is at 5 cm (2 in) depth.
-
Connect the cable to the SoilVue 10, and hand tighten the cable connector nut to ensure a water‑tight seal. Do not over tighten. The cable nut should turn easily. If it does not, check to make sure it is correctly aligned. Also, try gently pushing in on the cable.
WARNING:Do not over tighten. Never use a wrench or spanner on the cable connector nut because it will damage the connector.

-
After connecting the cable, carefully replace the soil around the top of the probe while adding water and packing well.
-
Route the cable to the data logger or Aspen 10 Edge Device.

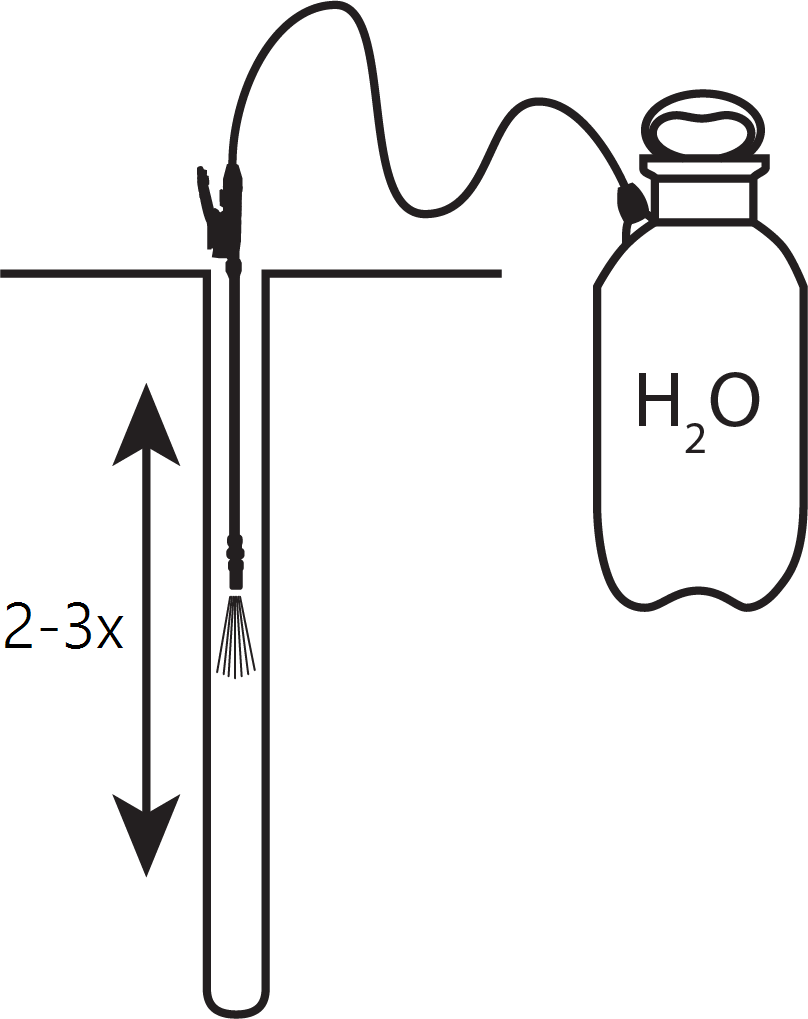
When adding water to the hole, avoid eroding the sides and introducing air gaps. Also avoid standing water at the bottom of the hole.

