Replacing the SkyVue PRO PSU
The Power Supply Unit (PSU) can be replaced in the SkyVue PRO as follows:
-
Disconnect the power to the SkyVue PRO and open the housing.
-
Disconnect all the plugs from the PSU
-
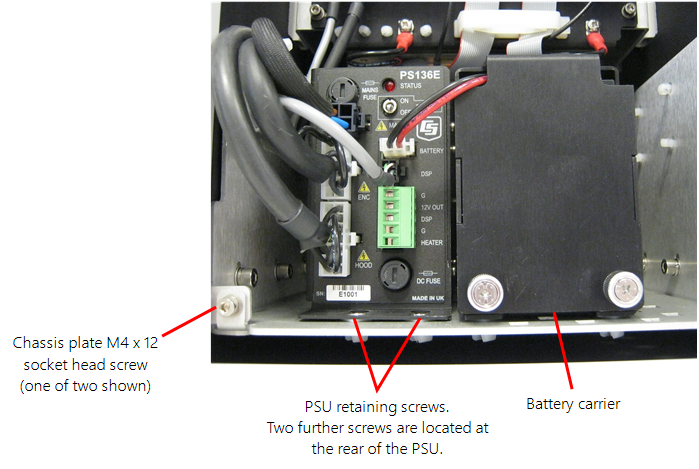
Use a 3 mm ball-end hexagonal-key to remove the two M4 x 12 socket head screws on the chassis plate that are on the bent-up tabs on the left and right hand sides.
-
Pull the PSU forward removing the PSU
-
Loosen the four screws holding the PSU in place and slide off the PSU.
-
Re-insert the new PSU and push back into position.
-
Replace the two screws on the chassis plate.
-
Re-attach the cable plugs into the correct sockets on the new PSU ensuring that each is connected properly.
-
Ensure that the battery (if used) is reconnected to the PSU.