SkyVue 8 Laser/APD module replacement
Basic procedure:
-
Isolate the SkyVue 8 from
-
Remove the access door using the supplied key.
-
Disconnect the cables from the Power Supply Unit (PSU) including the battery.
NOTE:It is very important to disconnect
-
Unscrew the two securing screws from the PSU chassis plate so it can be pulled out to gain better access to the Laser and APD module.
-
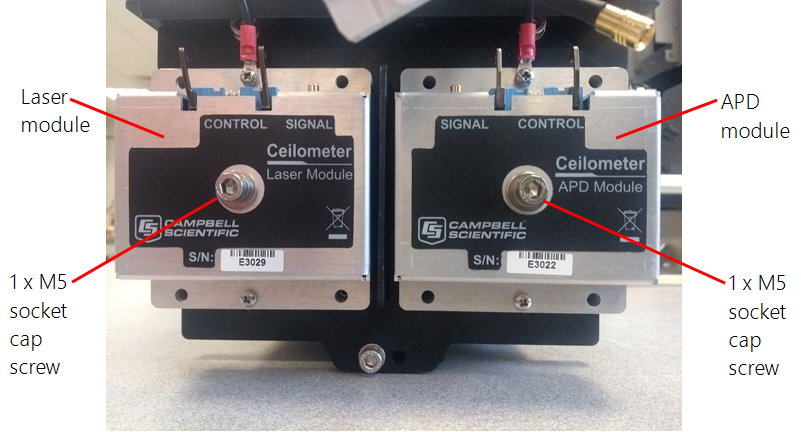
Now the Laser module and avalanche photo diode (APD) module will be visible.
-
Disconnect the ribbon cable and SMB connector from the module that is being replaced. To avoid damage only pull the gold metal part of the SMB connector.
-
WARNING:
Do not loosen any other screws.
WARNING:Do not replace screws with different length screws.
-
Remove any protective film from the filters of the new APD and laser modules before mounting them.
-
Once the screws have been removed pull the module off the locating pins. Fit the new module by pushing it onto the locating pins and then re-assembling, in reverse order, using the original screws, spring washers and plain washers.
-
Reconnect the ribbon cable and SMB connector to the module before closing and securing the access door.
NOTE:Make sure the module sits flat against the plate before tightening the four screws.