Configuring the RF451/RF452
Radios are configured using the Campbell Scientific Device Configuration Utility software tool that comes with LoggerNet. Device Configuration Utility is also available for free from the Campbell Scientific website. The following general procedure is used to configure an RF451/RF452 radio via Device Configuration Utility:
-
Launch Device Configuration Utility from the LoggerNet toolbar Utilities category.
-
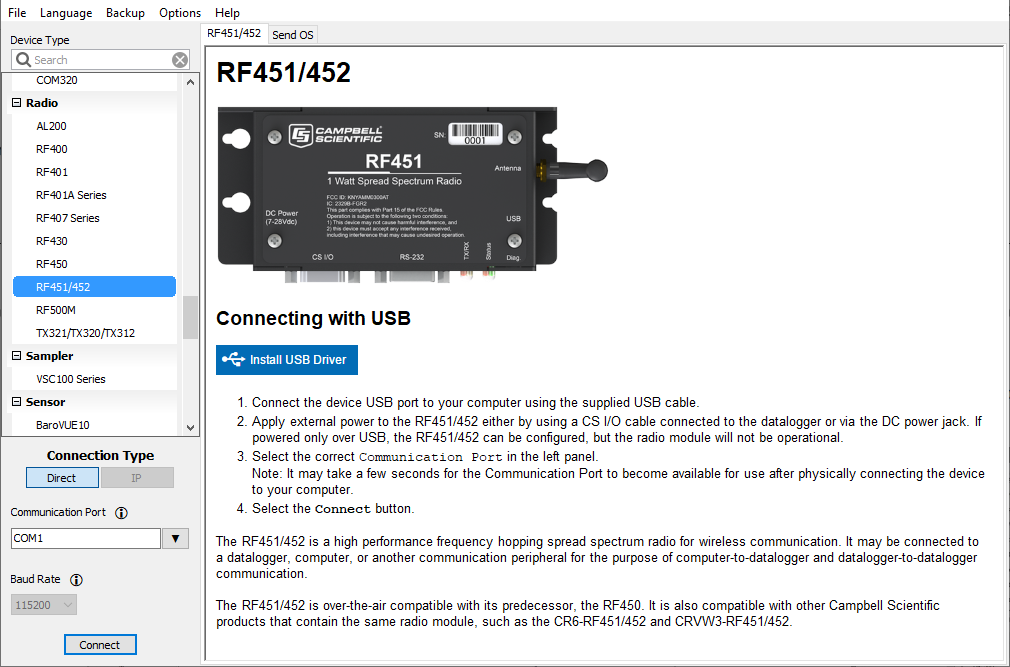
From the Device Type list, select the RF451/RF452. Information, instruction, and help are provided on each screen.
-
Click the Install USB Driver button. Carefully review the text on the right side of the screen. Installing the driver only needs to be done the first time the computer is connected to an RF451/RF452.
NOTE:Install the device driver before plugging a radio into your computer for the first time. You will need to have the device driver properly installed before you can connect to the radio via USB.
-
With the USB device driver installation complete, connect the supplied USB cable between the USB port on your computer and the USB port on the radio.
-
Select the correct COM port for USB communications with the radio. It should be listed in the dialog as RF451/RF452 (COM#) where # is the COM port number.
NOTE:It may take a few seconds for the Communication Port to become available for use after physically connecting the RF451/RF452 to your computer.
-
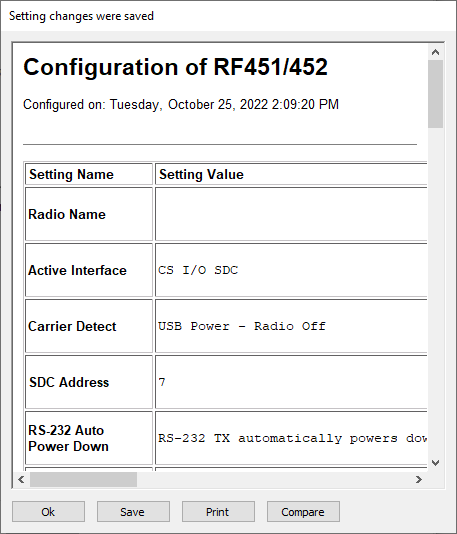
Click Connect. The radio Status LED will turn yellow. After several seconds, a screen similar to the following will appear:
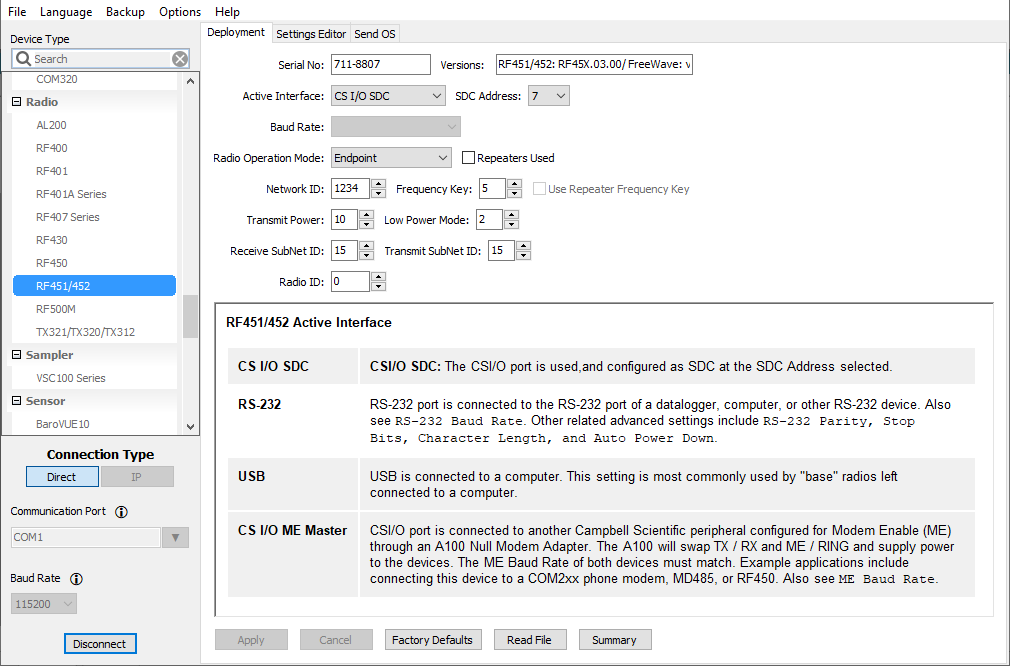
Deployment, Settings Editor, and Send OS tabs are available. The Deployment tab contains all the standard parameters that need to be set for a PakBus™ network. The Settings Editor tab may be used to access all of the FreeWave® Radio settings. It should be used by experienced FreeWave Radio users only. New operating systems for the Campbell Scientific board are loaded through the Send OS tab.
Device Configuration Utility makes applying the same settings to multiple devices easy. Once settings are configured for one device, click Apply to save your changes; a summary screen will be shown. Click Save to save a configuration file. This file can then be used to load the settings into another RF451/RF452. Click Read File to load the settings in Device Configuration Utility. Then click Apply to save your changes to load the settings into the RF451/RF452.