QuickStart – Basic networks
This procedure assumes the RF407-series devices are using factory default settings.
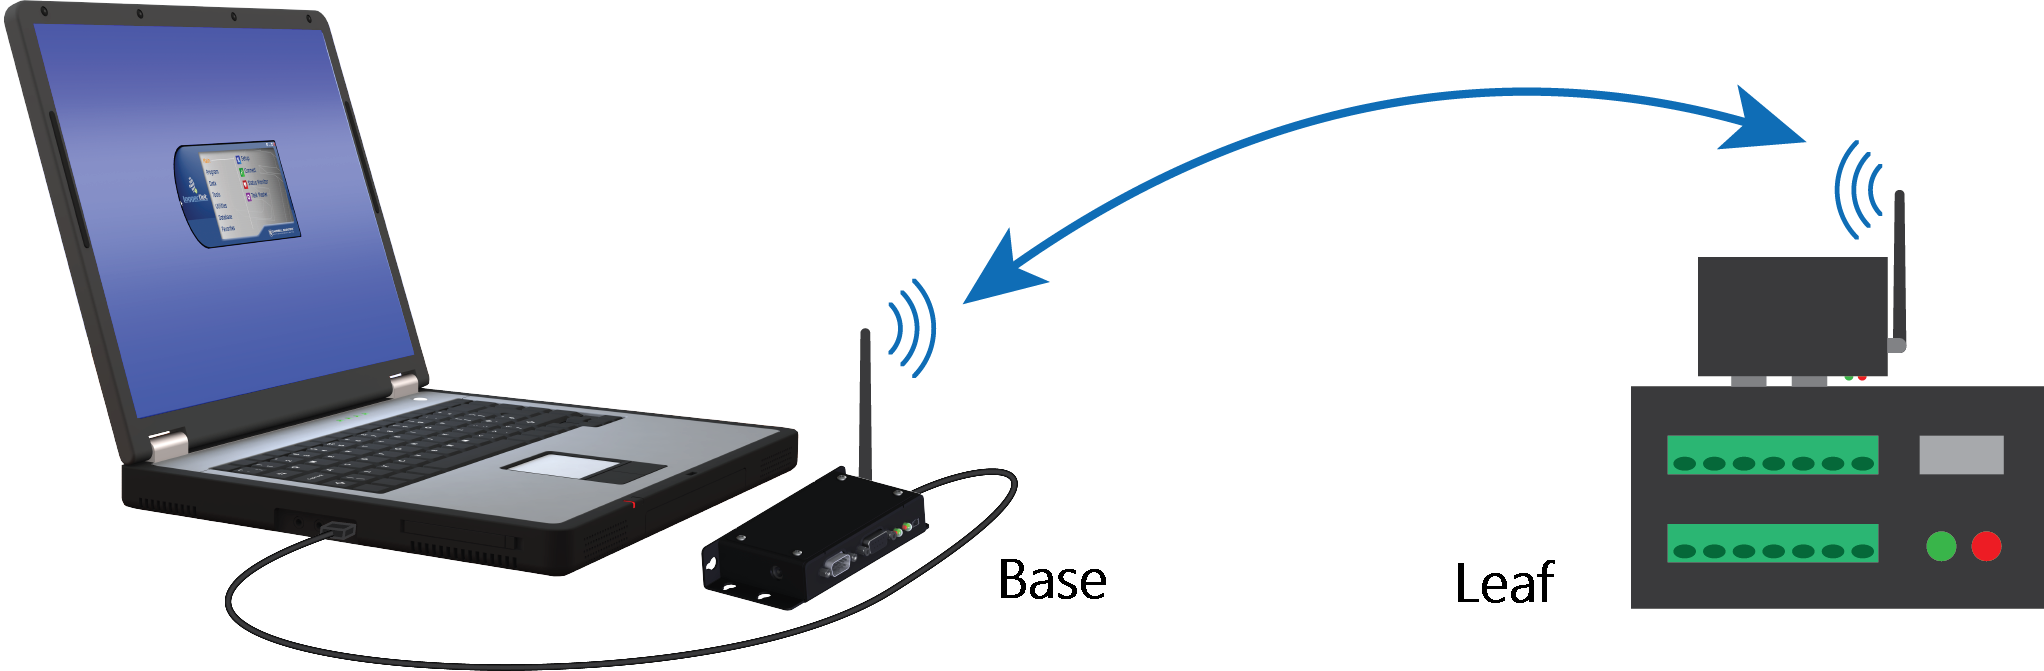
Configure the base RF407-series radio
Configure the RF407-series radio that is connected to the computer. This is sometimes referred to as the base radio.
-
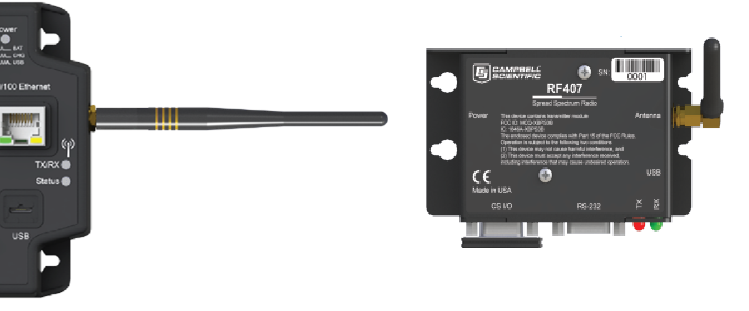
Ensure that an antenna is connected to the RF407-series radio.
-
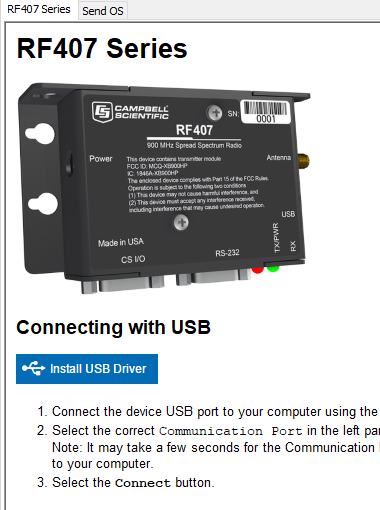
If connecting via USB for the first time, you must first install USB drivers using Device Configuration Utility (select your radio, then on the main page, click Install USB Driver).
-
Connect the USBport on your RF407-series radio to your computer.

-
Using Device Configuration Utility, select the Communication Port used for your radio and connect to the RF407-series radio.
-
On the Main tab, set the Active Interface to USB or RS-232 (depending on how your computer will be connected to the RF407-series radio).
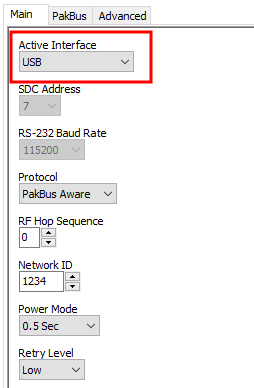
- Apply to save your changes.
-
Close Device Configuration Utility.
-
The TX/PWR and RX LEDs flash once, after which the TX/PWR LED returns to blinking at the Power Mode interval (0.5 sec, by default).
-
Leave the radio connected to the computer.
If the Active Interface was set to RS-232, disconnect the USB cable. Use a serial cable to connect the computer RS-232 port to the RF407 RS-232 port.
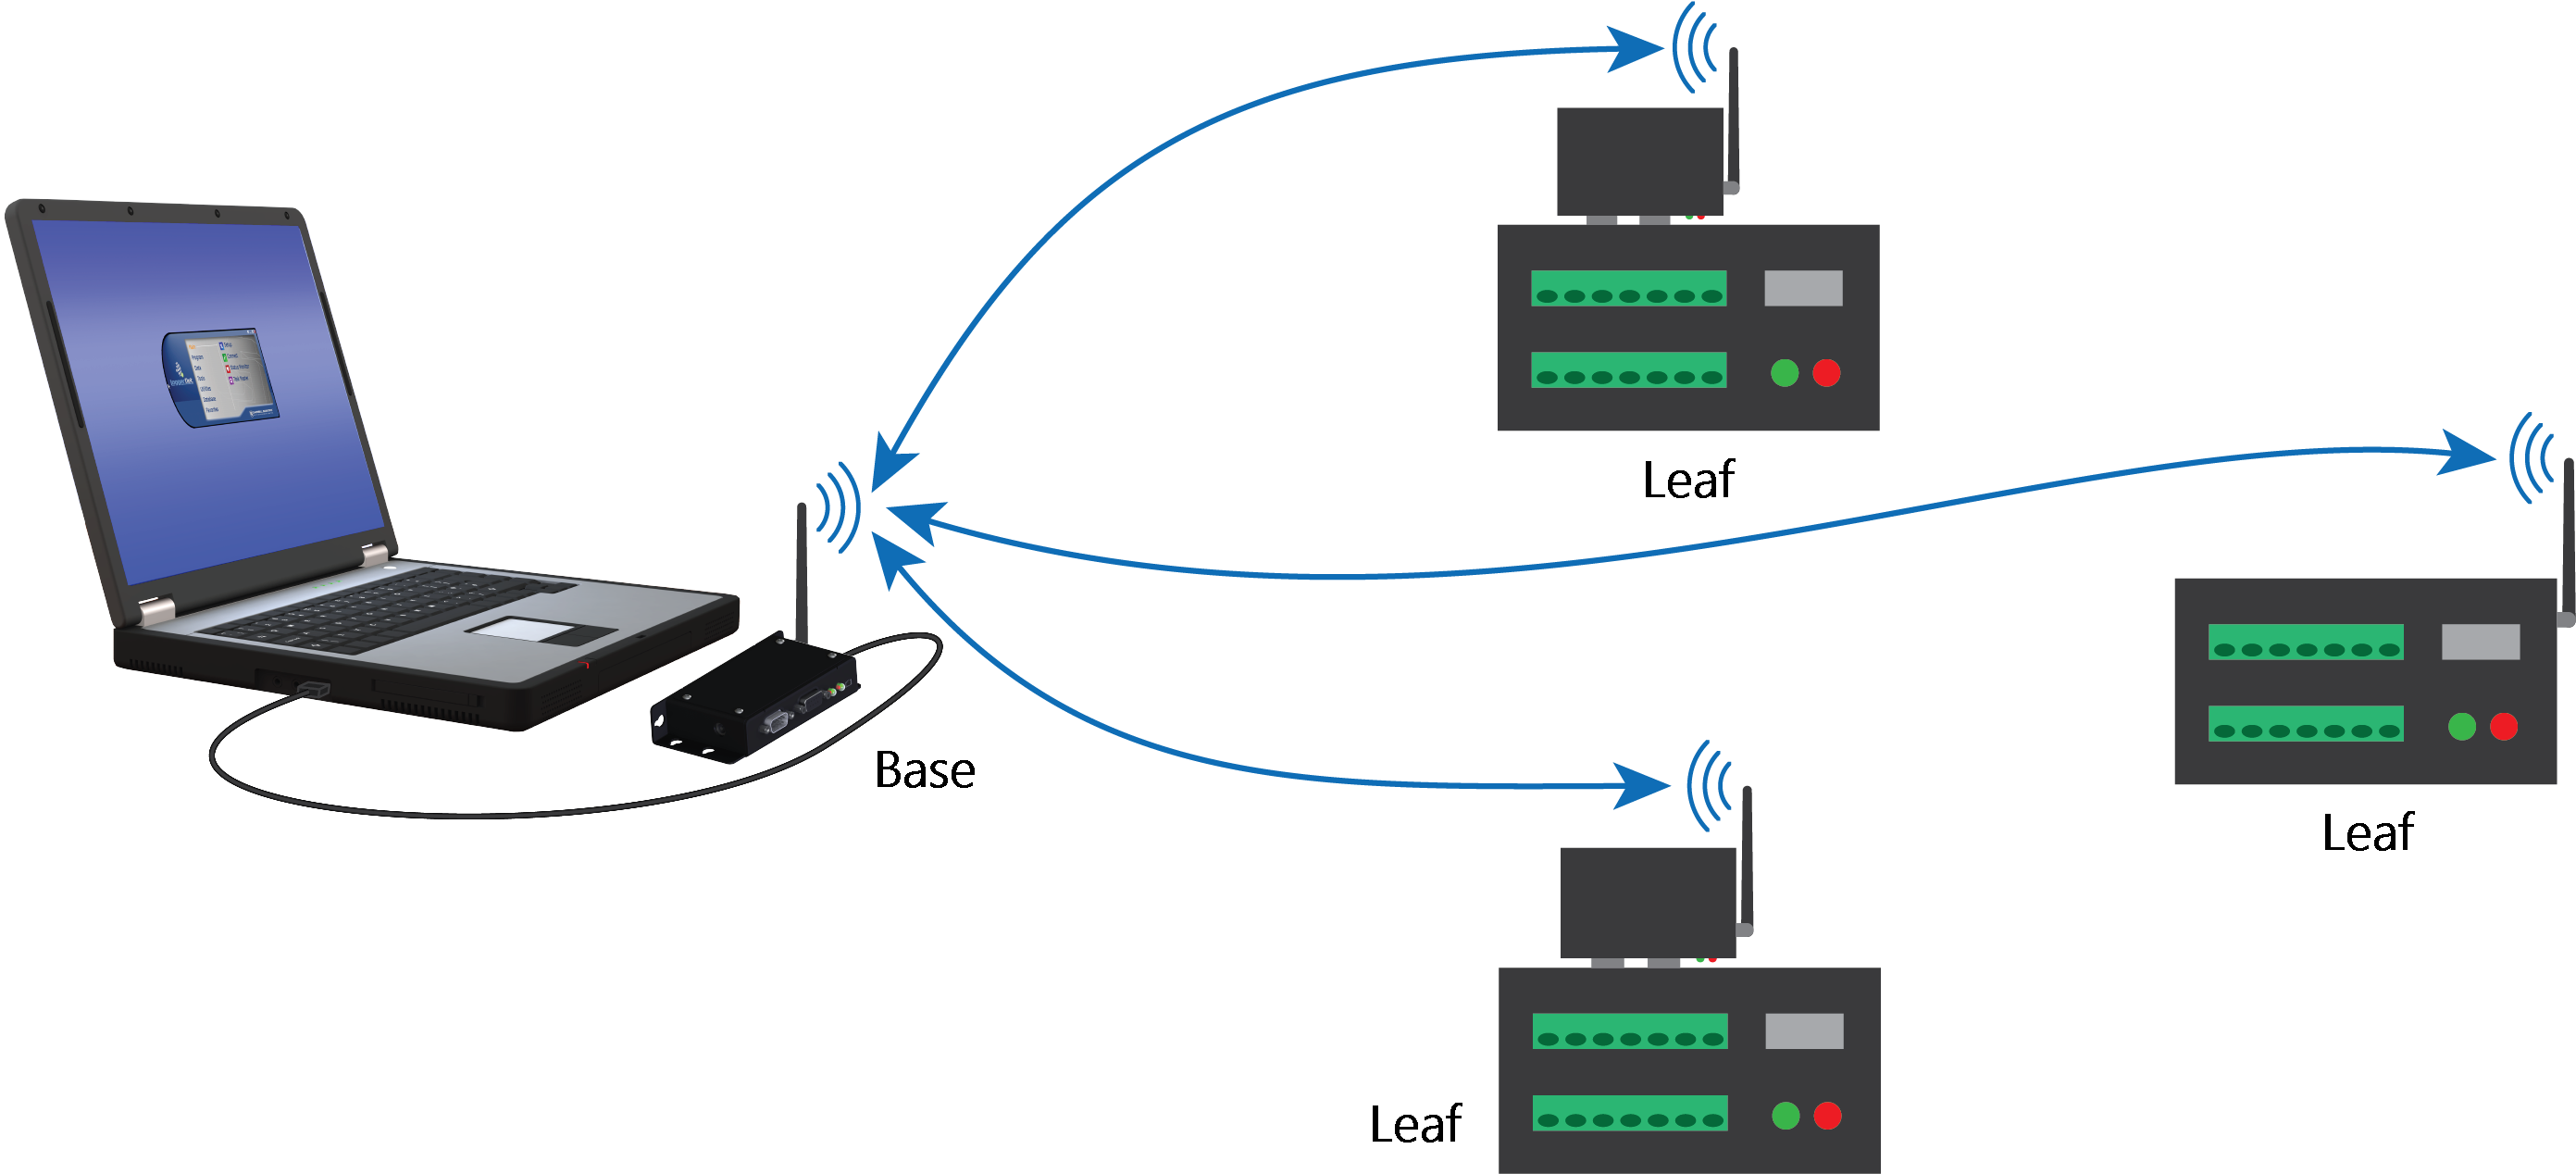
Configure the remote RF407-series data logger(s)
Follow these instructions multiple times to set up multiple data loggers. In this case, each data logger must be given a unique PakBus address. For more complicated networks, it is recommended that you use Network Planner.
Most Campbell Scientific devices come from the factory with a default PakBus address of 1. For this reason, it is best not to assign PakBus address 1 to any device in the network. Then, if a new device with default settings is added to the system, it will not create a conflict.
-
Ensure the antenna is connected.
-
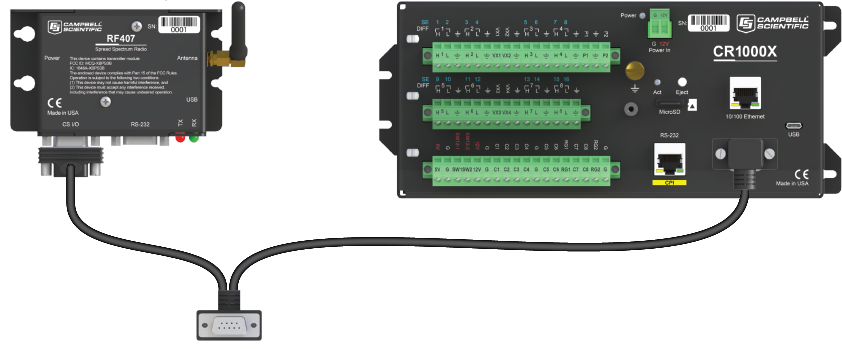
For data loggers with an external radio, connect the radio and data logger CS I/O ports using an SC12 cable.
-
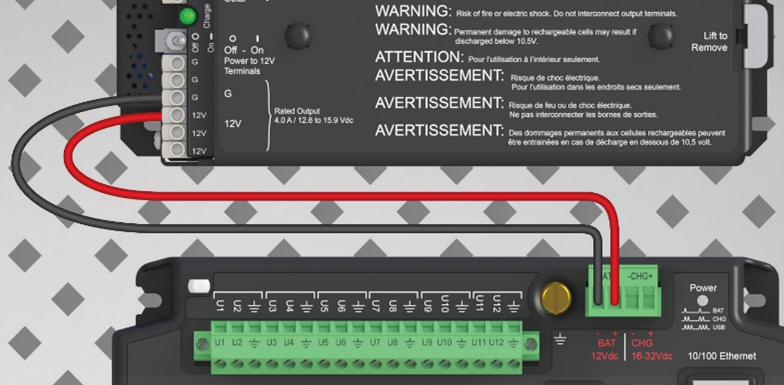
Supply 12 VDC power to the data logger.
-
connect 12 VDC at the green BAT terminals
-
or connect 16 to 32 VDC at the CHG terminals
-
-
Using data logger support software, launch the EZSetup Wizard.
-
LoggerNet users, from the Main category click Setup
 and select the View menu to ensure you are in the EZ (Simplified) view, then click Add
 .
. -
PC400 users, click Add Datalogger
.
-
-
Click Next.
-
Select
-
Select the Direct Connect connection type and click Next.
-
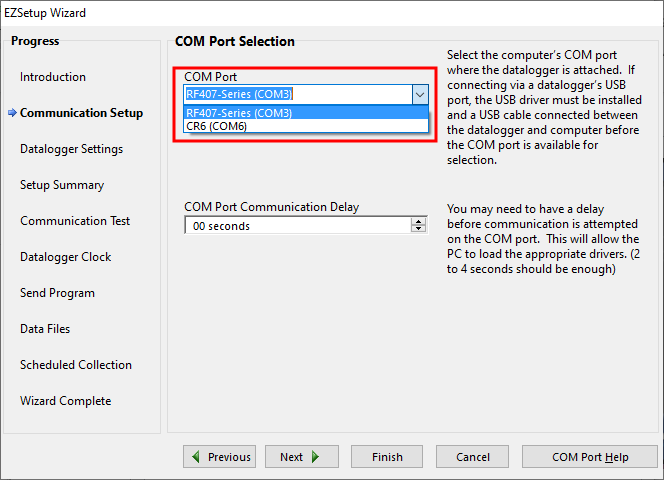
Select the communications port used to communicate with the RF407-series radio from the COM Port list. It should be listed as RF407-Series (COMX).
TIP:If the RF407-Series (COMX) is not in the list ensure your RF407 is connected to your computer.
-
Accept the default value of 00 seconds in the COM Port Communication Delay - this box is used to allow time for hardware devices to "wake up" and negotiate a communications link. Click Next.
-
In Configure the base RF407-series radio you selected an active interface option of USB or RS-232. If you selected USB as the active interface for the radio, you do not need to select a baud rate. If you selected RS-232, set the baud rate to the one chosen during that step. The radio default baud rate is 115200. The PakBus address must match the hardware settings for your data logger. The default PakBus Address is 1.
-
Click Next.
-
By default, the data logger does not use a security code or a PakBus encryption key. Therefore, the Security Code can be set to 0, and the PakBus Encryption Key can be left blank. If either setting has been changed, enter the new code or key.
-
Click Next.
-
Review the Setup Summary. If you need to make changes, click Previous to return to a previous window and change the settings.
Setup is now complete. The EZSetup Wizard allows you to Finish, or you may click Next to test communications, set the data logger clock, and send a program to the data logger.
The RF407-series radio to RF407-series data logger link is not indicated in the LoggerNet Setup Standard View.
If you experience network communications problems, see Troubleshooting for assistance.