Computer connection using the A200
The A200 or another device is required to connect the CS451/CS456 to a computer. This allows sensor settings to be changed using the Device Configuration Utility.
Driver installation
If the A200 has not been previously plugged into your computer, the A200 driver needs to be loaded onto your computer.
Drivers should be loaded before plugging the A200 into the computer.
The A200 drivers can be downloaded, at no charge, from: www.campbellsci.com/downloads ![]() .
.
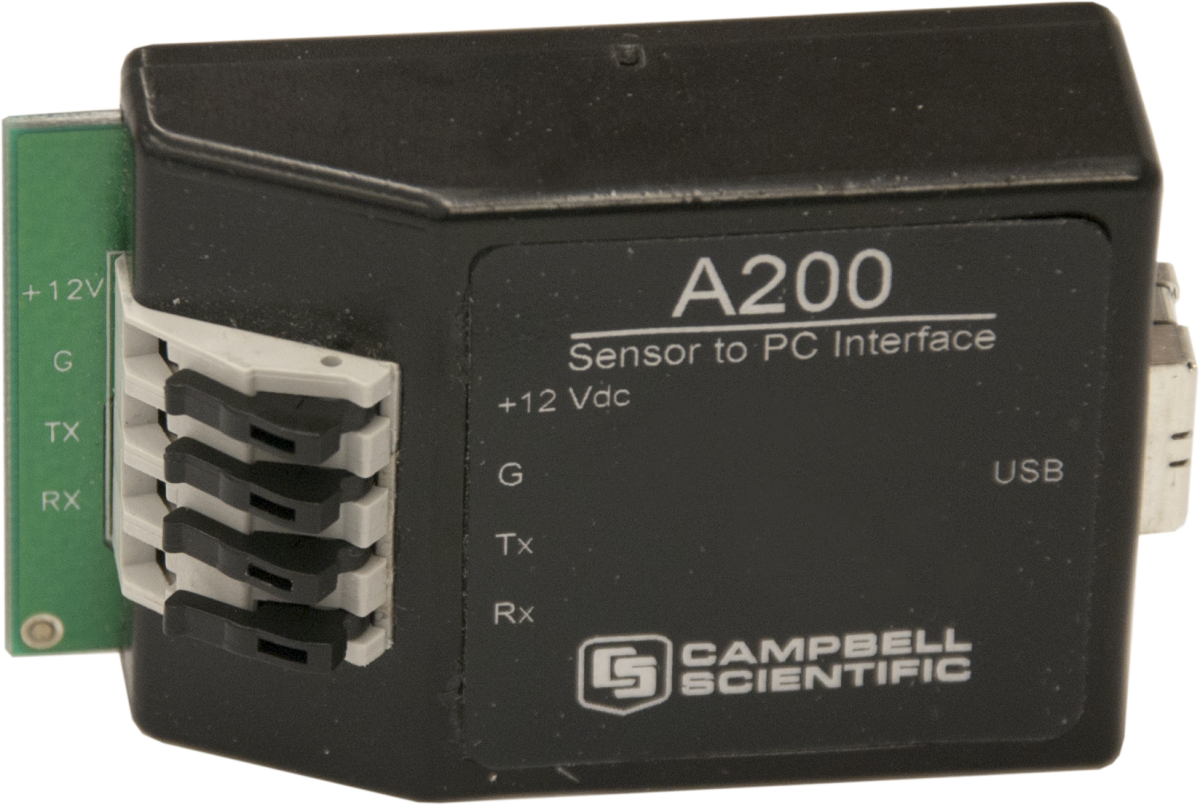
A200 wiring
One end of the A200 has a terminal block while the other end has a type B female USB port. The terminal block provides 12V, G, Tx, and Rx terminals for connecting the sensor (see A200 Sensor-to-Computer Interface and A200 wiring). The data cable shipped with the A200 has a USB type-A male connector that attaches to a computer USB port, and a type B male connector that attaches to the A200 USB port.
|
Color |
Sensor cable label |
A200 terminal |
|---|---|---|
| Red | 12V | +12Vdc |
| Black | G | G |
| White | C | Tx |
| Blue | G | Rx |
| Yellow | G | G |
| Clear | Signal ground | G |
Powering the sensor
The A200 provides power to the sensor when it is connected to a computer USB port. An internal DC/DC converter boosts the 5 VDC supply from the USB connection to a 12 VDC output is required to power the sensor.
Determining which COM port the A200 has been assigned
When the A200 driver is loaded, the A200 is assigned a COM port number. This COM port number is needed when using the Device Configuration Utility.
Often, the assigned COM port will be the next port number that is free. However, if other devices have been installed in the past (some of which may no longer be plugged in), the A200 may be assigned a higher COM port number.
To check which COM port has been assigned to the A200, watch for the appearance of a new COM port in the list of COM ports offered in the software package (e.g., LoggerNet) before and after the installation, or look in the Windows Device Manager list under the ports section (access via the control panel).