Renaming the default network
When an account is created, a default network is automatically associated with the account. Best practice is to rename the default network with a name that is meaningful to the organization. The following procedure demonstrates renaming the default network.
-
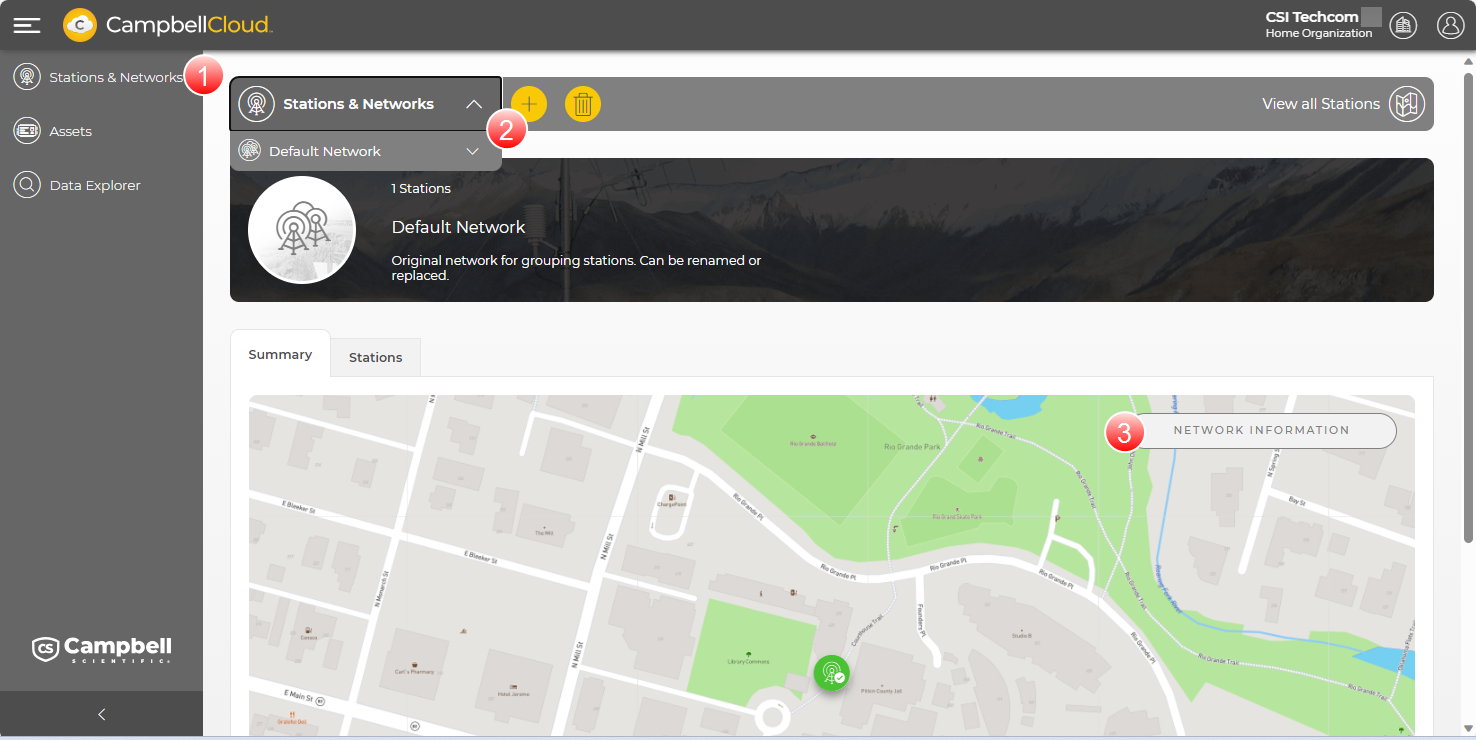
Select Stations & Networks from the application menu on the left.
-
In the Stations & Networks dropdown menu, select Default Network.
-
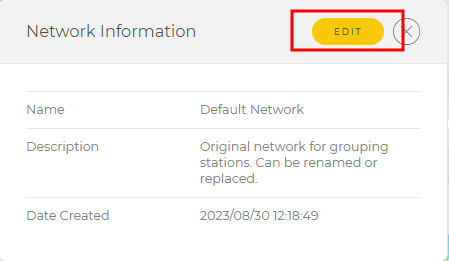
Click Network Information.
-
Click EDIT.
-
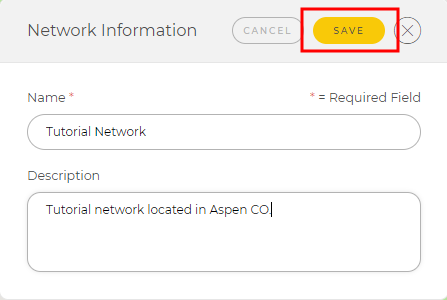
Enter a meaningful network Name.
-
(Optional) Enter a Description of the network.
-
Click SAVE.
-
A message Network saved successfully appears to confirm the name change. Click the home button
 or any app in the left column (Application menu) to exit.
