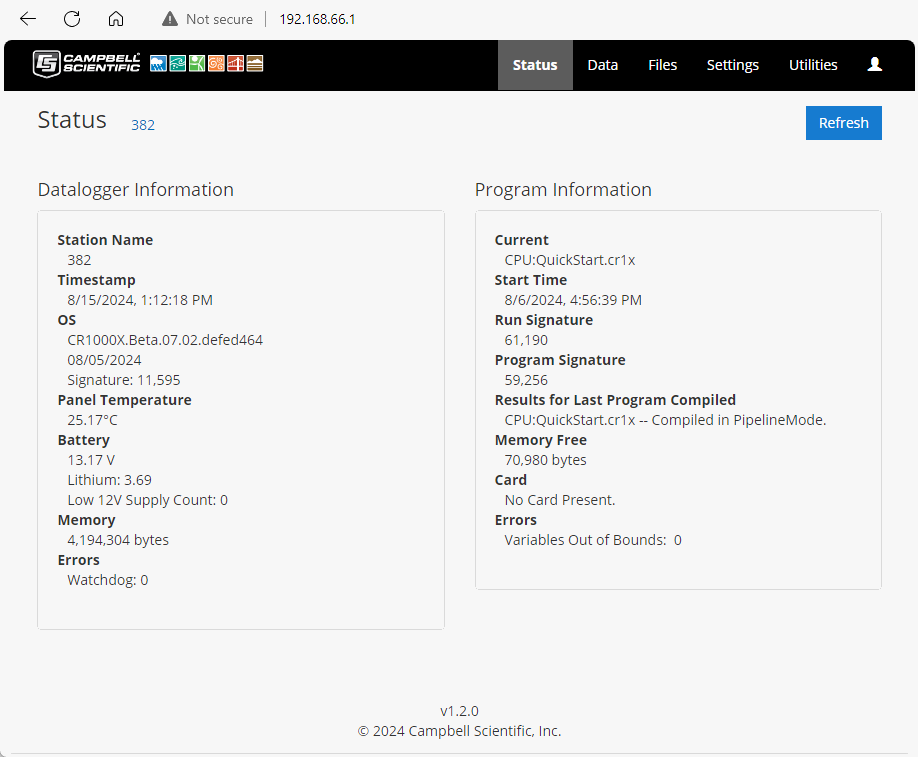
Web interface
For data loggers with an IP or ![]() RNDIS Remote Network Driver Interface Specification - a Microsoft protocol that provides a virtual Ethernet link via USB. (virtual Ethernet over USB) connection, the built-in web interface provides access to real-time and stored data logger data, status and setting information, files, and more.
RNDIS Remote Network Driver Interface Specification - a Microsoft protocol that provides a virtual Ethernet link via USB. (virtual Ethernet over USB) connection, the built-in web interface provides access to real-time and stored data logger data, status and setting information, files, and more.
For more information on the web interface, watch an instructional video at: https://www.campbellsci.com/videos/web-interface  .
.
Using an RNDIS connection
Use the following steps.
-
Supply power to the data logger.
- Ensure that the USB drivers have been installed on your computer. If you have connected to a GRANITE 6 with this computer, the drivers have been installed. If this is the first time using this computer, see USB or RS-232 communications.
- The default RNDIS address is 192.168.66.1. Type this address into a web browser to access the web interface.
Ensure the data logger is connected directly to the computer USB port (not to a USB hub). We recommend always using the same USB port on your computer each time you connect.
Using an IP connection
To use a standard IP connection (not RNDIS) to access the web interface, HTTP or HTTPS access must be enabled. By default, HTTP is enabled and HTTPS is disabled.
There are two ways to edit or set permissions for access.
Through Device Configuration Utility (option 1)
-
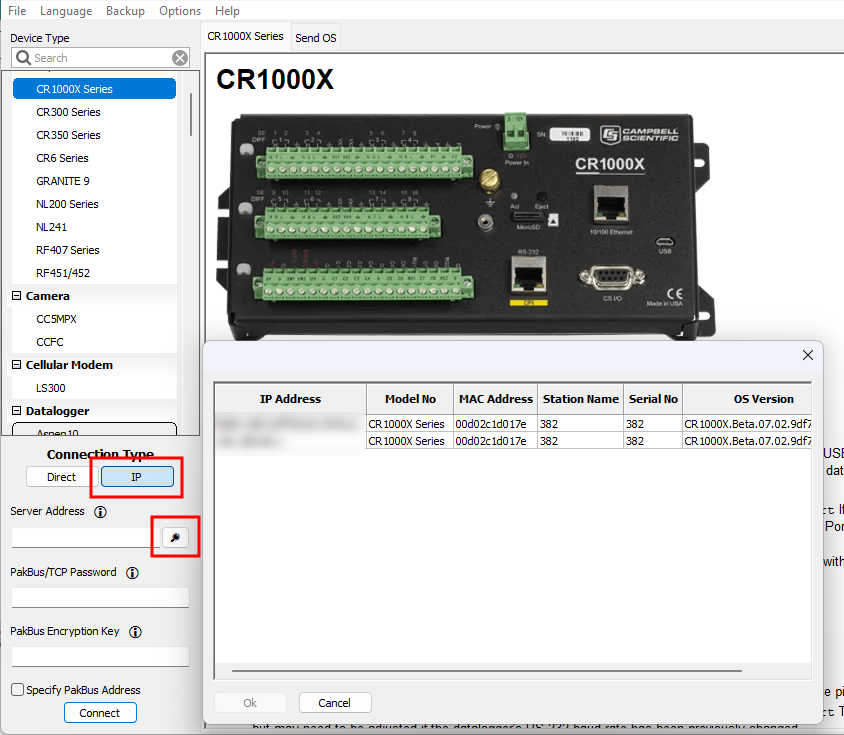
If you do not know the data logger IP address, retrieve it through Device Configuration Utility. On the bottom, left side of the screen, select IP as the Connection Type, then click the browse button next to the Server Address box. If you have multiple data loggers in your network, more than one data logger may be returned. Ensure you select the correct data logger by verifying the data logger serial number or station name (if assigned).
-
Enter the PakBus Encryption Key
-
To edit or set additional permissions to access the web interface, use Device Configuration Utility > Networks Services > Edit Accounts (in older versions this button is labeled Edit .csipasswd File). To add permissions, click Add User. Multiple user accounts with differing levels of access can be defined for one data logger.
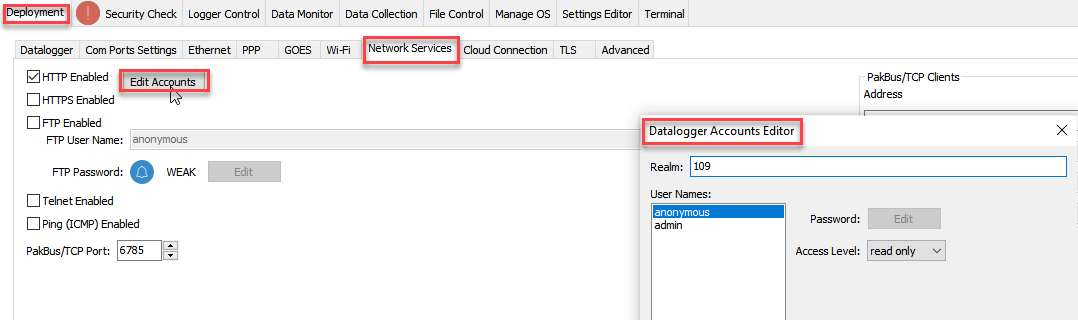
Four levels of access are available:
-
Anonymous: Read-only access. This account cannot be removed, but privileges can be disabled.
-
Read Only: Data collection is unrestricted. Clock and writable variables cannot be changed. Programs cannot be viewed, stopped, deleted, or retrieved.
-
Read/Write: Data collection is unrestricted. Clock and writable variables can be changed. Programs cannot be viewed, stopped, deleted, or retrieved.
-
All (Administrator): Data collection is unrestricted. Clock, writable variables, and settings can be changed. Programs can be viewed, stopped, deleted, and retrieved. Hidden tables can be viewed. Files, including programs can be sent to the data logger.
-
-
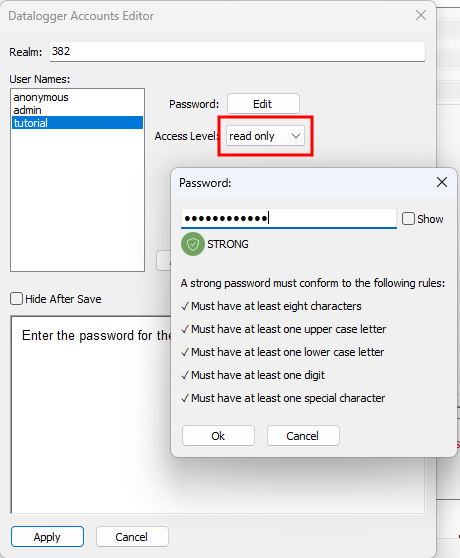
Assign an Access Level and Password.
- Type the data logger IP address into a web browser. If prompted, enter the user name and password that you just configured through Edit Accounts.
Through the Web Interface (option 2)
-
If you do not know the data logger IP address, retrieve it through Device Configuration Utility. See the previous step 1.
-
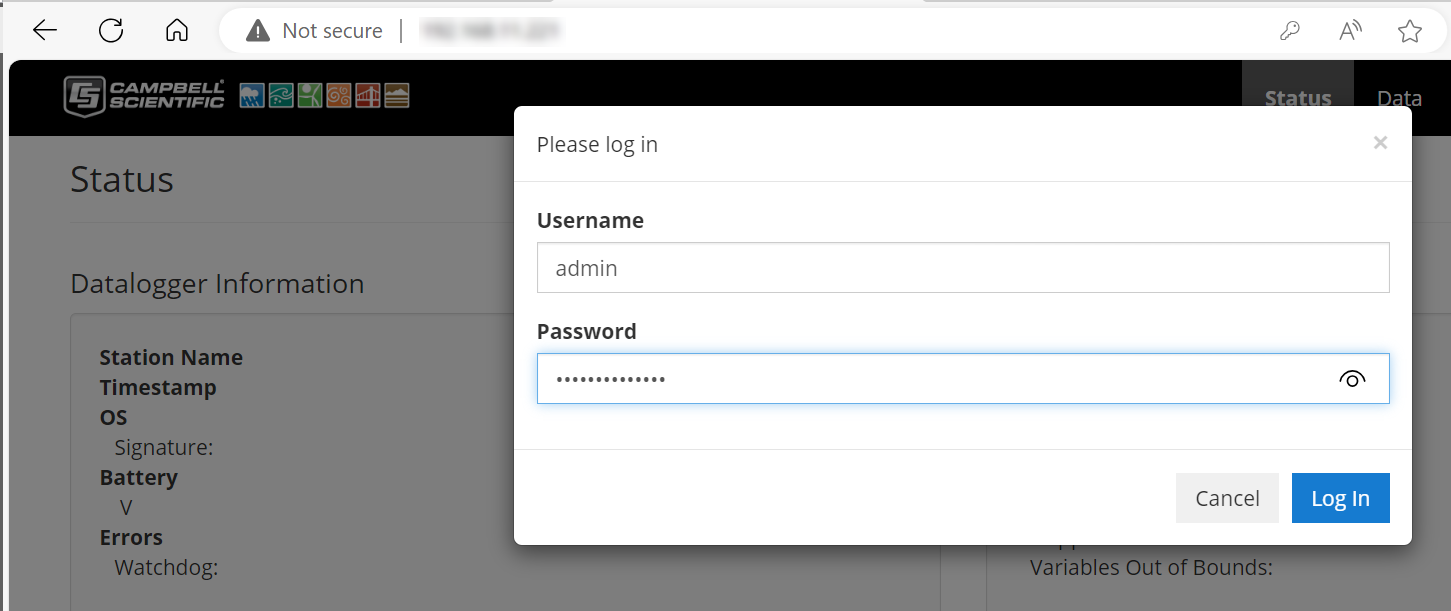
Once you have the data logger IP address, type it into a web browser.
-
When prompted, enter the user name admin
-
To edit or set additional permissions to access the web interface, select Manage Accounts. This is also accessible through the
 icon.
icon. 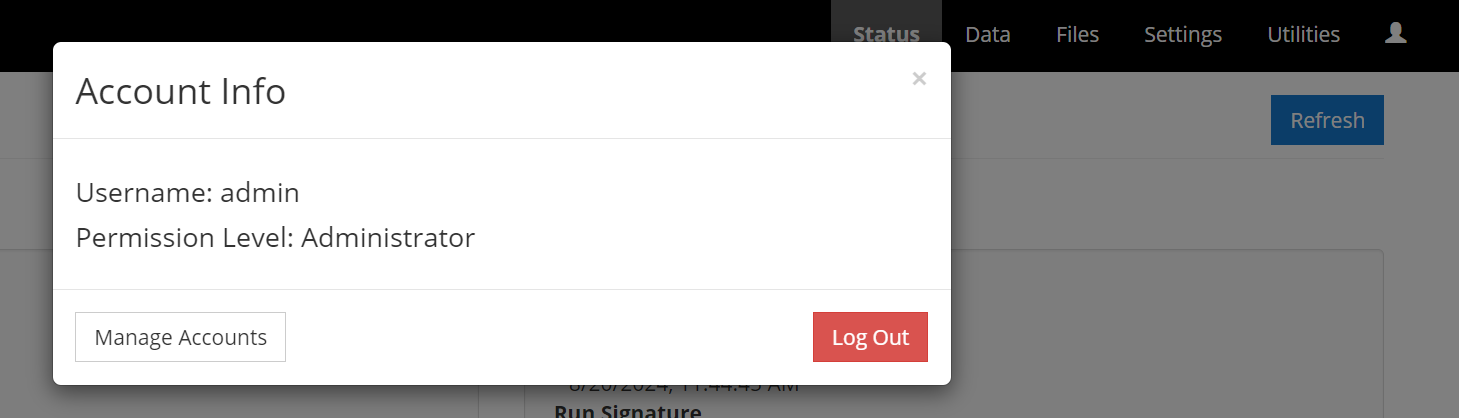
-
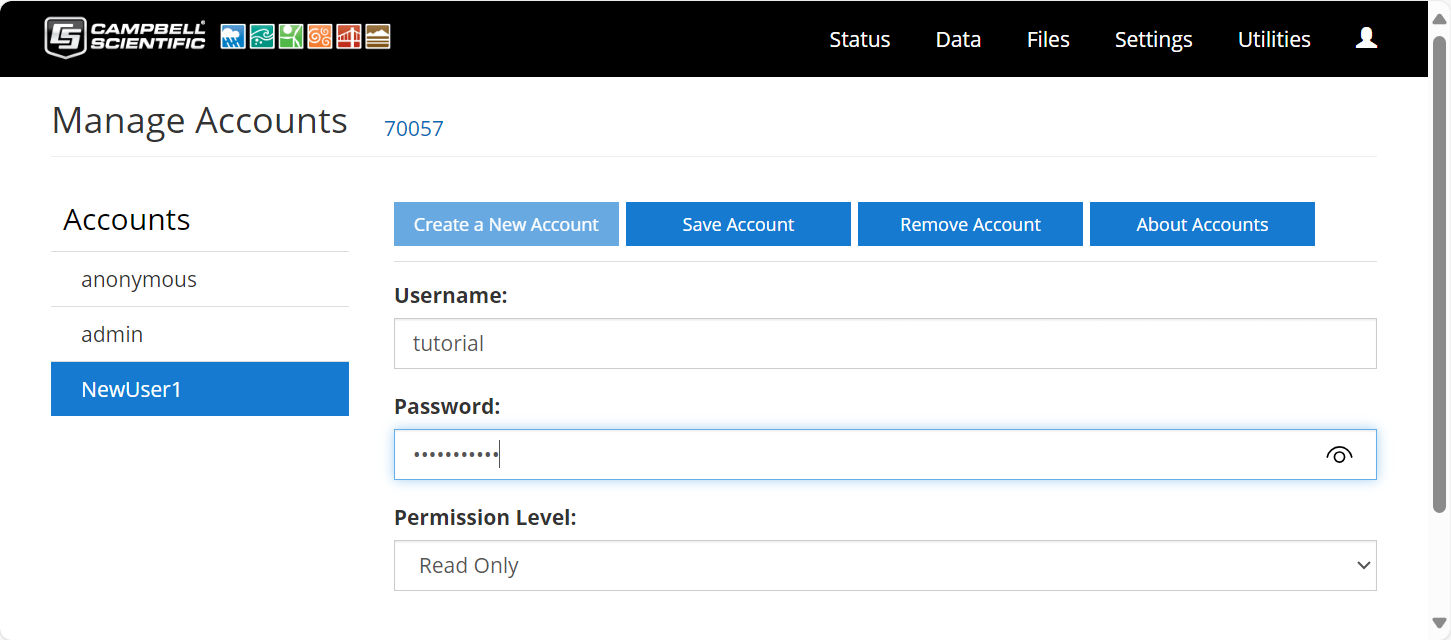
To add permissions, click Create a New Account. Multiple user accounts with differing permission levels can be defined for one data logger. Enter a Username, Password, and Permission Level. Click Save Account.
Four levels of access are available:
-
Anonymous: Read-only access. This account cannot be removed, but privileges can be disabled.
-
Read Only: Data collection is unrestricted. Clock and writable variables cannot be changed. Programs cannot be viewed, stopped, deleted, or retrieved.
-
Read/Write: Data collection is unrestricted. Clock and writable variables can be changed. Programs cannot be viewed, stopped, deleted, or retrieved.
-
All (Administrator): Data collection is unrestricted. Clock, writable variables, and settings can be changed. Programs can be viewed, stopped, deleted, and retrieved. Hidden tables can be viewed. Files, including programs can be sent to the data logger.
-
Web interface recovery
In the unlikely event that web interface files are lost or corrupted, a data logger-hosted recovery page can be used to restore the web interface. This page can also be used to update the web interface when new versions are available. The recovery page is accessed by navigating to: datalogger IP Address/recovery. For example: 111.222.333.444/recovery. This will open a Recovery page in the browser.
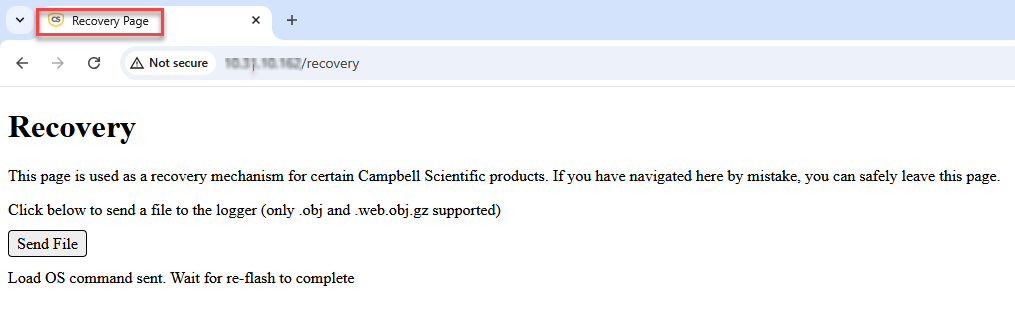
The Send File button on the recovery web page allows users to upload .obj or web.obj.gz files to restore web interface files on the data logger. The upload process may take several minutes.