AWS
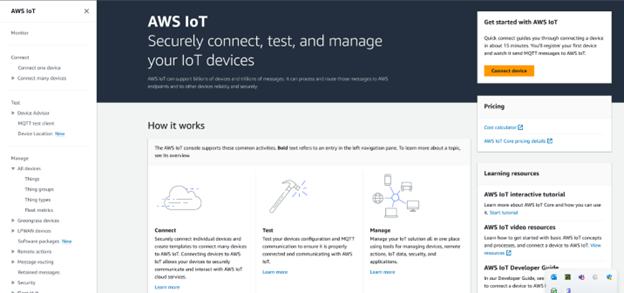
This example uses the public Amazon Web Services (AWS) IoT test broker https://aws.amazon.com/free/iot/ ![]() for testing. This section is provided as a convenience; Campbell Scientific does not provide technical support for AWS.
for testing. This section is provided as a convenience; Campbell Scientific does not provide technical support for AWS.
Setup AWS IoT
-
Open a web browser and set up an account at https://aws.amazon.com/free/iot/
 .
. -
Go to https://us-west-2.console.aws.amazon.com/iot/
.
-
Near the bottom of the left menu select Settings. Copy the Endpoint address. It will end in something like
iot.us-west-2.amazonaws.com. You will need this later to configure the data logger. -
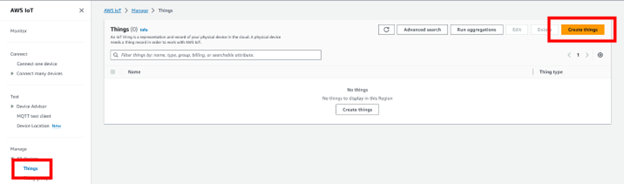
Go to Manage> All Devices >
 Things A thing resource is a digital representation of a physical device or logical entity in AWS IoT.. In this case the CR350 is the Thing.
 -
Click the Create Things button.
-
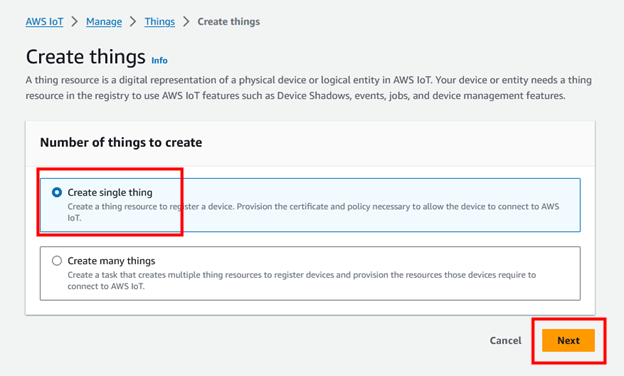
Select Create single thing.
-
Click Next.
-
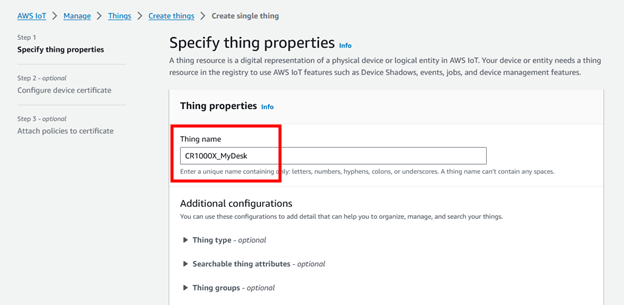
Give your Thing a name in the Thing name field. Make note of this value, it will also be the MQTT Client ID in the data logger configuration later.
NOTE:Thing name cannot contain spaces.
CAUTION:Each data logger in the network must have a unique MQTT Client ID. Duplicate Client IDs can cause unstable connections, and high data usage over a cellular connection when only a small amount of data is being published.
-
Click Next.
-
On the Configure device certificate screen, select Auto-generate a new certificate. Click Next.

-
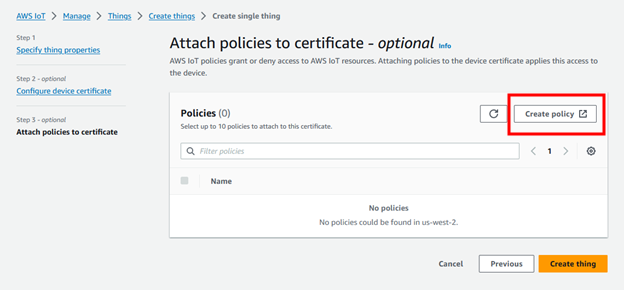
On the Attach policies to certificate screen, click Create policy. This will open a new tab.
-
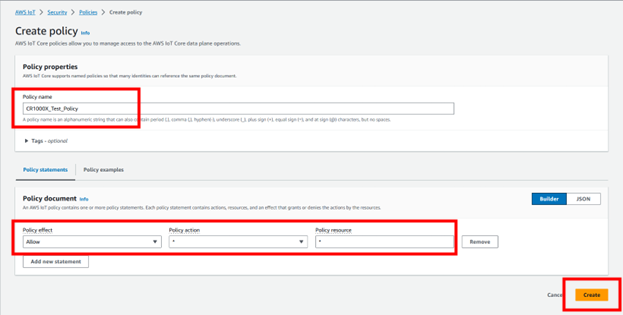
On the Create policy screen enter a Policy name. Ensure that Allow is set for the Policy effect. In the Policy action and Policy resource fields enter an asterisk * for a wild card. Click Create.
-
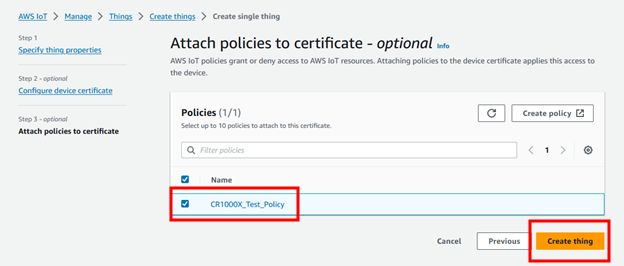
On the Attach policies to certificate screen, select the Policy you created and click Create thing.
-
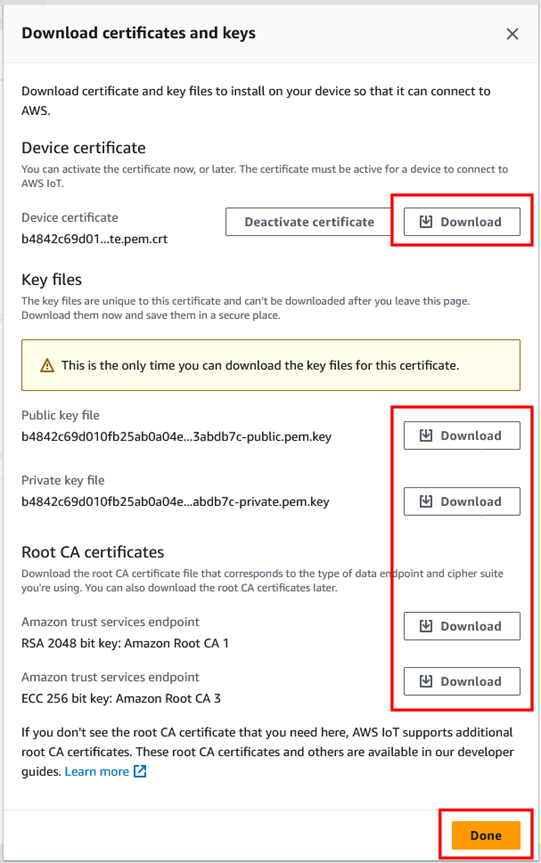
On the Download certificates and keys screen save all your certificates and keys. This is the only time you can download the key files for this device. In a secure location, save the device certificate, Public key file, Private key file, and Root CA certificate. They’ll be needed for setting up the data logger. Click Done.
Configure the data logger
-
On your computer, navigate to the location your certificates and keys are saved.
-
Rename the
AmazonRootCA1.pemfile toCAroot.pem. -
Connect to your data logger via USB.
NOTE:For a secure TLS setup the certificates and key must be sent over a direct connection. They cannot be sent over IP.
-
Using
Device Configuration Utility Software tool used to set up data loggers and peripherals, and to configure PakBus settings before those devices are deployed in the field and/or added to networks. Also called DevConfig., connect to the data logger. -
Select the File Control tab and click Send.

-
Browse to the
CAroot.pemfile. Click Open.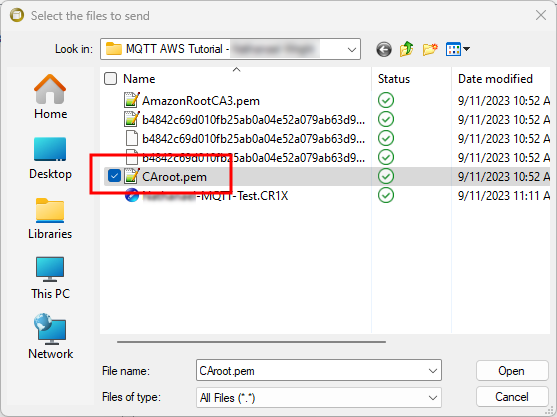
-
Select Deployment > TLS.
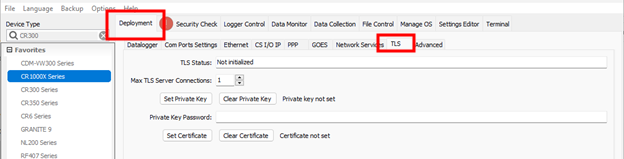
-
Set Max TLS connections to 5.
-
Click Set Private Key and upload the Private key file by browsing to it and clicking Open. The file name will end in
private.pem.key. -
Click Set Certificate and upload the Certificate by browsing to it and clicking Open. The file name will end in
certificate.pem.crt. -
Click Apply to save the changes.
-
Click Connect to reconnect to your data logger.
-
On the Settings Editor tab, click the MQTT sub-tab.

-
On the MQTT tab set the following:
- MQTT Enable to Enable with TLS or Enable with TLS-Mutual Authentication
- MQTT Broker URL to the Endpoint address that you copied, saved, or noted. See Setup AWS IoT step 3.
- Enter
8883for the Port Number. - MQTT Client ID to the Thing name set in Setup AWS IoT step 8.
- MQTT Base Topic is the Publish Policy set in Setup AWS IoT step 10.
-
Click Apply to save the changes.
Program the data logger
Use MQTTPublishTable() within a DataTable/EndTable declaration to publish stored data via MQTT. See CRBasic Editor Help – MQTTPublishTable (Publish Datalogger Table to MQTT) ![]() for detailed instruction information and program examples.
for detailed instruction information and program examples.
|
|
Five minutes is the fastest recommended publishing interval in order to ensure that ingestion and processing of data sent to the MQTT broker are completed before new data is received.
Verify data in AWS IoT
-
In AWS IoT click MQTT test client > Subscribe to a topic.
-
Enter a # symbol (wildcard) in the Topic filter field. Click Subscribe.
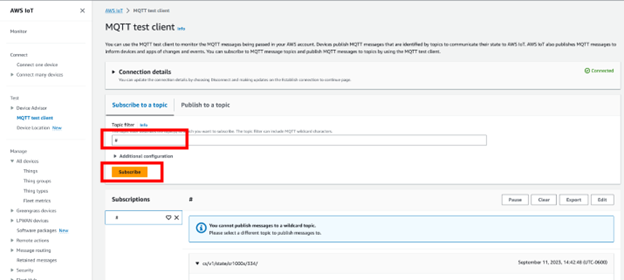
-
Confirm data is being received in the Subscription area at the bottom of the screen.