Configure data logger
-
Connect the cellular antenna if it is not already connected. When using a
 MIMO Multiple-input multiple-output antenna antenna with multiple cellular connections, connect the primary cable to Primary, Primary Antenna, or Antenna and the secondary to Diversity or Diversity Antenna (depending on the label). If the cables are not marked in this way, they can be connected to either antenna port.
 The CELL230 has both Antenna and GPS antenna connections. Use
CellGNSS()to enable and disable the GPS under program control. - Connect to your data logger by using Device Configuration Utility.
-
On the PPP tab, set Config/Port Used to CS I/O SDC8 or RS-232, depending on how you are connected to the data logger.
-
(Optional) On the PPP tab, set User Name and Password if required by your cellular carrier (usually outside of the United Sates).
-
(Optional) If your cellular carrier requires user name and password authentication, on the Settings Editor > Cellular tab, set PDP Authentication Type, PPP Authentication Username and PPP Authentication Password.
-
Verify the Modem Dial String setting is blank.
-
If connecting through RS-232, on the Comport Settings tab, set RS232 BaudRate to 115200 Fixed.
-
On the Cellular tab, enter the APN provided by your cellular provider.
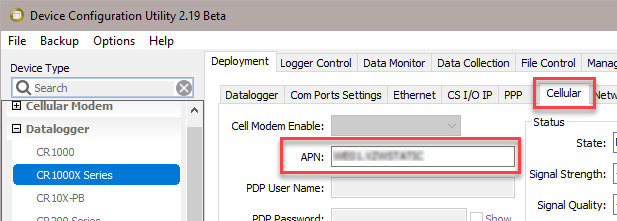
(Click image to expand/collapse display) -
(Optional) By default, the CR350-CELL series will accept incoming communications from any IP address. This can be a security risk. You may specify up to four IP addresses, with wild cards, to limit connections to only those trusted sources. Use an asterisk (*) as a wild card. For example, a setting of 166.22.*.* would allow connections from devices that have IP addresses starting with 166.22. Both IPv4 and IPv6 addresses are supported.
CAUTION:Only set a Trusted IP address if you are familiar with their use. Consult your IT department or Campbell Scientific for assistance.
NOTE:This setting does not affect outbound connections, only incoming connections.
In the Device Configuration Utility go to the Settings Editor then Network Services. Next to the Trusted Hosts field, click Edit and Add your trusted IP addresses, one at a time.
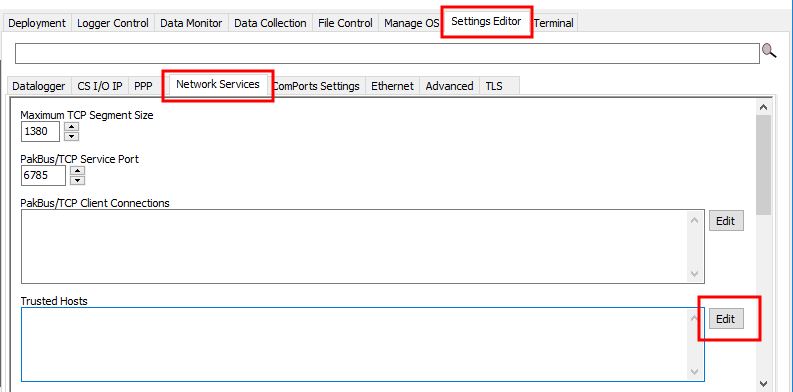
(Click image to expand/collapse display) -
Click Apply to save the changes.