Set up LoggerNet
The LoggerNet Network Map is configured from the LoggerNet Setup screen.
Setup has two options, EZ (simplified) and Standard. Click on the View menu at the top of the Setup screen, and select Standard view.
From the LoggerNet toolbar, click Main > Setup and configure the Network Map as described in the following steps:
-
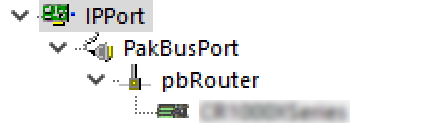
Select Add Root > IPPort.
-
Select PakBusPort and pbRouter
 NOTE:
NOTE:PakBus data loggers include the following models: GRANITE-series, CR6, CR3000, CR1000X, CR800-series, CR300-series, CR1000, and CR200(X)-series.
-
Add a data logger to the pbRouter.
-
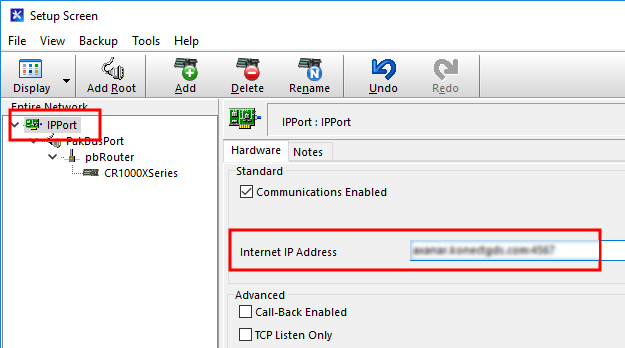
From the Entire Network, on the left side, select the IPPort. Enter the Konect PakBus Router DNS address and port number as noted in the Konect PakBus Router setup (Set up Konect PakBus Router). Enter them into the Internet IP Address field in the format DNS:Port with a colon separating DNS and Port. For example, axanar.konectgds.com:pppp where pppp is the port number.
(Click image to expand/collapse display) -
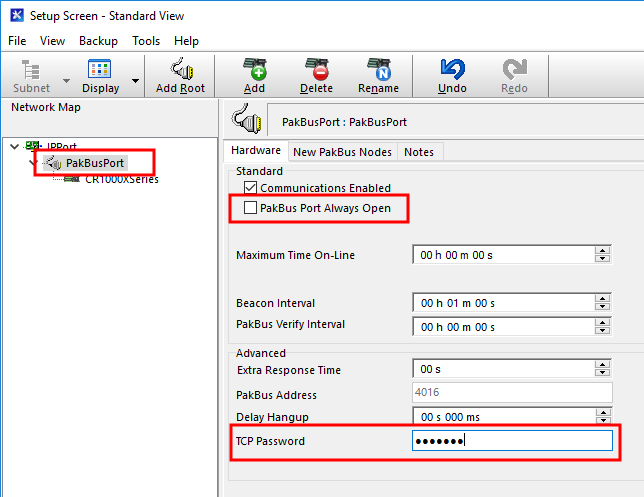
Leave the default settings for the PakBusPort. PakBus Port Always Open should not be checked. In the TCP Password field enter the TCP Password; this must match the value entered in the Konect PakBus Router setup and LoggerNet setup.
(Click image to expand/collapse display)
-
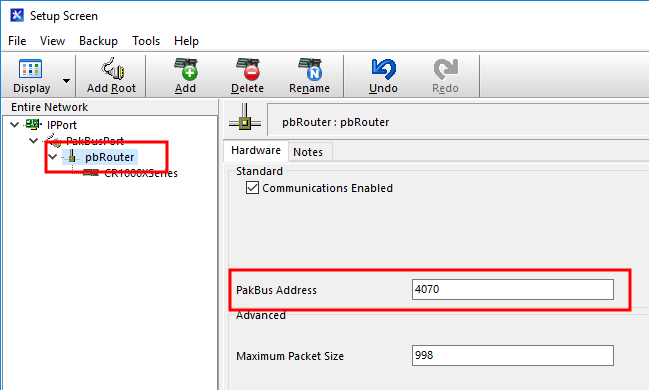
Select the pbRouter in the Network Map and set the PakBus Address to 4070.
(Click image to expand/collapse display) -
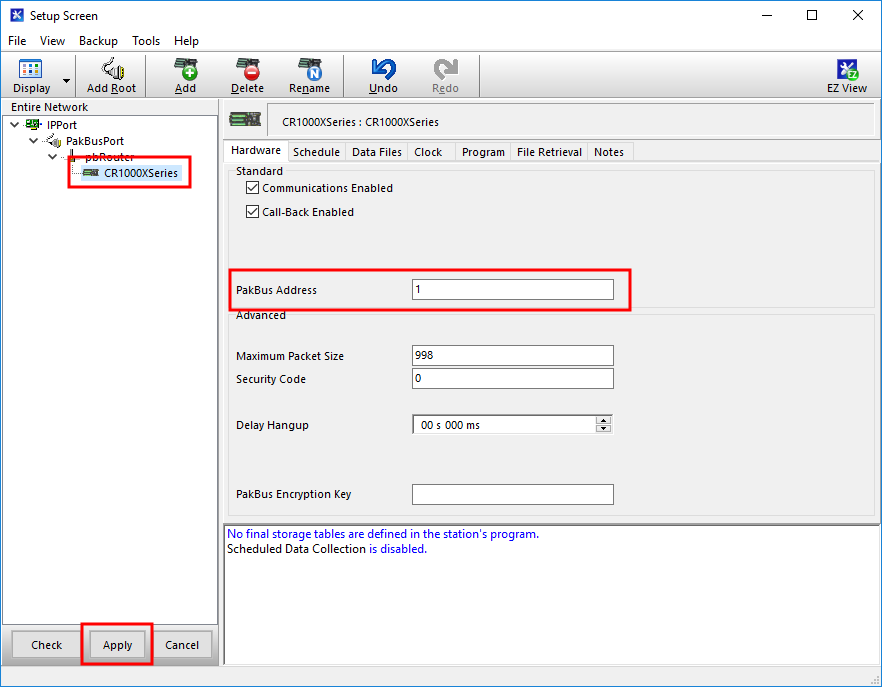
Select the data logger in the Network Map and set the PakBus Address to match that of the data logger (default address in the data logger is 1). If a PakBus Encryption Key was entered during data logger setup, also enter it here. Click Apply to save the changes.
(Click image to expand/collapse display)